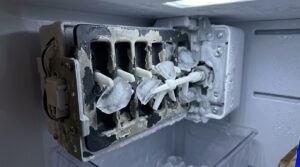
Diagnosing Refrigerator Drain Pan Overflow Linked to Defrost Drain Tube Duckbill Valve Failure
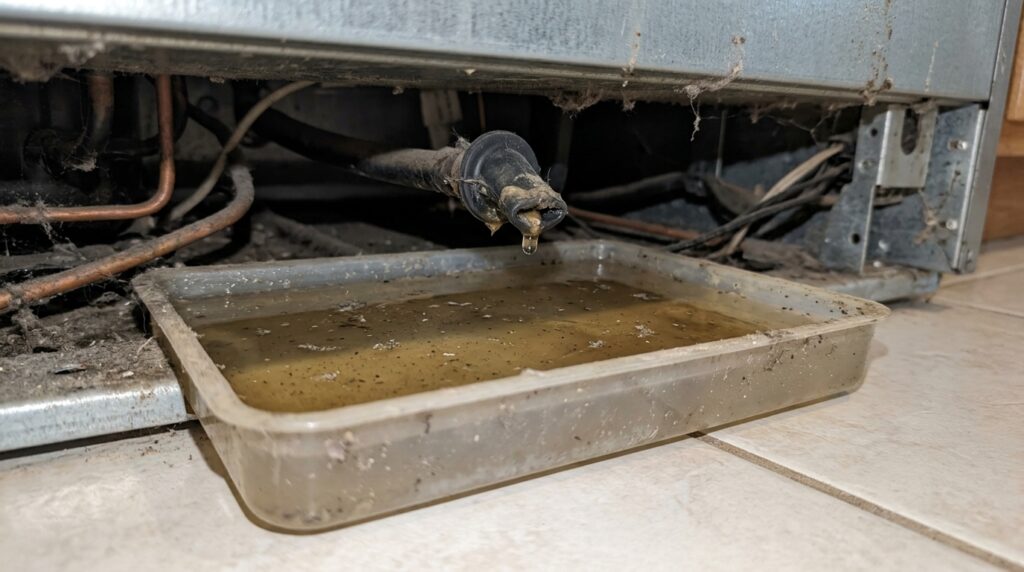
Diagnosing Refrigerator Drain Pan Overflow Linked to Defrost Drain Tube Duckbill Valve Failure
Water collecting under a refrigerator is one of the most disconcerting kitchen surprises, especially when the refrigerator is still cold and nothing seems to be leaking from the doors. Frost-free freezers create a startling quantity of meltwater each day and all of it must go down a limited drain channel to a shallow pan near the compressor. Many homeowners blame the ice maker line or a damaged door gasket. If this passage is broken , the pan can fill quicker than it evaporates and overflow on the floor . The rubber duckbill valve at the end of the defrost drain tube is often the minor part at the center of the problem. Cheap one-way valve stops warm air and scents from escaping but lets meltwater escape. In this post, we will cover how the drain system works, how a broken valve causes overflow, and how to detect, repair, and prevent the problem.
How Meltwater Travels Through the Defrost Drain System to the Pan
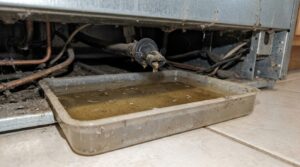
A frost free refrigerator prevents ice build up by cycling the cooling off and turning on a defrost heater near the evaporator coil. As the frost melts and flows down a defrost drain tube running along the rear wall of the cabinet, the water drips into a slanted trough beneath the coil. The tube then takes the water through the insulation and out of the cold compartment where it empties into a drain pan, often called the evaporator pan, placed near the compressor. The compressor’s heat and air flow from the condenser fan evaporate the water, therefore the pan does not fill up under typical conditions. A typical residential unit can transfer a cup or more of meltwater a day, and humid summers can raise that amount substantially. The whole system hinges on free flow, a strong seal at the tube exit and a pan that gets enough heat and air movement to dry everything off.
The Duckbill Valve: What It Is and Why It Matters
The duckbill valve is a soft rubber or silicone sleeve formed like the bill of a duck which fits over the lower end of the drain tube . When water is not flowing, its two flexible lips close together. They part gently under the weight of meltwater, then spring shut again when the flow stops. This simple check valve does two things. It prevents warm moist air from traveling up the tube into the freezer where it would add new frost to the evaporator coil. It also keeps out any scents, dust and insects that could otherwise find their way into the cabinet. The valve is one of the least expensive elements in the refrigerator since it is constructed of thin elastomer and it is located in a moist, unclean position and also one of the most likely to wear out. Some models have it at the tube exit, others hide it behind a lower back panel.
How a bad valve causes drain pan over flow
One method a faulty valve can produce overflow is more than one. If debris, ice or mineral scale locks the lips closed, meltwater cannot escape and backs up into the tube and trough. The stored water can freeze into a plug, pour over the freezer floor, and crawl under the lower compartment to reach the kitchen floor. If the valve breaks, hardens or sticks open, it no longer blocks warm air thus extra frost forms on the coil and each defrost cycle releases considerably more water than the pan was meant to handle. If a valve has slid off the end of the tube or has twisted out of position it can also redirect drips away from the pan altogether, so water lands on the base or the floor instead. In each case the pan simply looks to be the problem, when the failed valve is the real source.
Common causes of valve wear, blockage and displacement
Several causes limit the life of duckbill valves. Food particles, such crumbs or ice cream drips, that fall into the freezer gather in the trough and drain down into the valve, where they get stuck between the lips. Hard water leaves mineral scale, sweet spills leave a sticky film that glues the lips together. Rubber becomes brittle and breaks along its folds with changing temperatures over years, some silicone loses its spring and stays partly open. Mold and slime love the moist tube and make that film thicker. Rough handling can also create difficulty, as pressing the refrigerator closely against the wall, cleaning behind it recklessly, or reassembling panels after a previous repair might crush, pinch, or remove the valve. Overstuffed refrigerators against the back wall can make it easier for spilled food to get to the trough.
Warning Signs of Drain Tube & Valve Issues
The most typical early indicator is a sheet of ice on the floor of the freezer, or a tiny puddle under the crisper drawers, which suggests meltwater is backing up instead of draining away. You may see water dripping from the back wall of the fresh-food section, or detect a musty odor in the cabinet, or hear a gurgling sound after the defrost cycle. If the valve is jammed open, warm air will come in. Signs of this are thick frost on the evaporator cover, freezer burn on stored food, and warmer temperatures in the fridge . If you see a wet spot outside the cabinet near the front or rear base, or if the drain pan is full of hazy water, it means the cabinet has overflowed. Another indicator is timing – leaks often take place several hours after a defrost cycle has ended.
Other Causes of a Drain Pan Overflow That Should be Ruled Out
Don’t blame the valve until you’ve considered other defects that can cause a similar disaster. Normal water volume can leak from a damaged or poorly fitted pan. Another hypothesis is a weak evaporation. This is often caused by a failing condenser fan motor, excessively blocked condenser coils, or a compressor that is no longer producing enough heat . If a door gasket fails to seal or the door is left slightly ajar, humid air enters, causing excessive frost and, thus, more meltwater. A bad defrost heater, thermostat or control board, might create excessive ice build-up that all melts at once and overwhelms the drain channel. A obstruction further up the tube, a refrigerator that is not level or a leaking ice maker supply line might also look like a valve failure.
Step by Step Safe Inspections and Diagnostic Checks
First, unplug the refrigerator and place cloths around the bottom of it. Carefully slide the unit out and remove the bottom rear access panel and pull out the drain pan to check its water level, condition and any sediment or slime. Remove the shelves and bins from within the freezer and take off the rear evaporator cover to check the drain trough for ice, debris or excessive frost. Pour a cup of warm water SLOWLY into the trough and see where it travels. If drainage is slow or there is no flow, the tube or valve is blocked; if water bypasses the pan, the valve has become dislodged. Find the duckbill valve and remove it carefully. Check the lips for tears, stiffness or slime. Finally, make sure the refrigerator is level. A tiny tilt can affect the flow.
Cleaning, Replacement, and Long-Term Prevention
If it is just dirty, wash the valve with warm, soapy water and scrub the lips with a soft brush. Use a turkey baster or syringe to flush the drain tube with warm water, then use a flexible brush or pipe cleaner to remove any sticky residue. A little baking soda solution will control odor, but steer clear of boiling water and powerful chemicals that can twist plastic parts or damage the rubber. If the valve is cracked, damaged, ripped or permanently deformed, replace it with the correct model to get a tight fit. Reinstall with the lips downwards and the slit lined up vertically. Prevent a repeat by cleaning the pan and condenser coils twice a year, keeping food from touching the rear wall and replacing damaged gaskets. Call a technician if ice returns rapidly or heating issue suspected.