Crafting Radiant Smiles: A Comprehensive Guide on How to Whiten Teeth in Photoshop
Introduction:
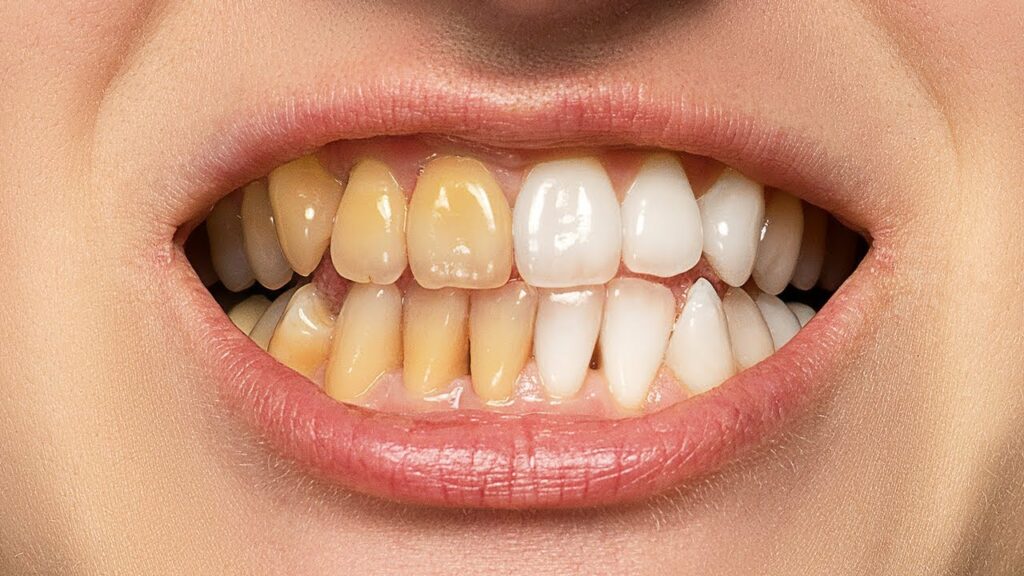
In the world of digital photo editing, Adobe Photoshop stands as a powerful tool that empowers users to enhance and perfect images with precision. One common enhancement sought by many is achieving brighter and whiter smiles in photographs. Whether you’re a photographer looking to enhance your portraits or an individual aiming for a picture-perfect smile, this comprehensive guide will walk you through the step-by-step process of whitening teeth in Photoshop, unveiling the secrets to achieving natural and radiant results.
Understanding the Basics:
Before delving into the intricacies of teeth whitening in Photoshop, it’s essential to acquaint yourself with some fundamental concepts:
- Adobe Photoshop: Photoshop, developed by Adobe, is a versatile graphic design and photo editing software known for its extensive set of tools and features.
- Layers and Masks: The concept of layers is foundational in Photoshop. Understanding how to work with layers and masks enables non-destructive editing, allowing changes without altering the original image.
- Brush Tool: The Brush tool is instrumental for selective editing. Mastering brush settings and techniques is crucial for precise teeth whitening.
- Adjustment Layers: Adjustment layers are powerful tools that allow you to make non-destructive changes to an image. The Curves adjustment layer is particularly useful for enhancing brightness and contrast.
Now, let’s embark on the step-by-step journey of whitening teeth in Photoshop:
Step 1: Open Your Image in Photoshop
a. Launch Photoshop and open the image containing the smile you want to enhance by navigating to “File” > “Open” and selecting the desired file.
Step 2: Duplicate the Background Layer
a. In the Layers panel, right-click on the Background layer and choose “Duplicate Layer.” This ensures you work on a copy, preserving the original image.
Step 3: Zoom In for Precision
a. Zoom in on the smile area to ensure precision when applying whitening adjustments. This allows you to see finer details and achieve a natural-looking result.
Step 4: Select the Teeth Area
a. Utilize the Quick Selection Tool or the Lasso Tool to carefully select the teeth area. Ensure the selection is accurate, covering the entire teeth region.
Step 5: Add a Curves Adjustment Layer
a. Click on the “New Adjustment Layer” icon at the bottom of the Layers panel and select “Curves.”
b. Ensure the adjustment layer is clipped to the teeth area by right-clicking on the adjustment layer and choosing “Create Clipping Mask.”
Step 6: Adjust Brightness and Contrast
a. In the Curves Properties panel, create an S-curve to enhance both brightness and contrast. Adjust the curve until you achieve the desired level of whiteness.
b. Fine-tune the curve to balance the brightness, avoiding over-whitening, which can result in an unnatural appearance.
Step 7: Refine with Layer Masks
a. Click on the mask thumbnail of the adjustment layer.
b. Use the Brush Tool with a soft brush and black color to refine the mask. Painting with black conceals the effect, allowing you to clean up any spillage onto surrounding areas.
Step 8: Adjust for Realism
a. Reduce the opacity of the Curves adjustment layer if the whitening effect appears too intense. This step ensures a more natural and seamless integration with the original image.
Step 9: Final Touches and Export
a. Fine-tune the overall image, ensuring cohesion between the enhanced smile and the rest of the photo.
b. Once satisfied, save your work by navigating to “File” > “Save As” or “Export” to preserve the changes in your preferred format.
Advanced Tips for Precision:
- Use a Soft Brush: When brushing on adjustment layers or masks, use a soft brush with a low opacity. This creates a gradual and natural transition between edited and unedited areas.
- Experiment with Other Adjustment Layers: Depending on the image, you can experiment with adjustment layers like Vibrance or Selective Color to refine the overall appearance of the smile.
- Consider Individual Tooth Adjustments: For images where individual teeth need attention, create separate adjustment layers for each tooth. This allows for precise adjustments tailored to each tooth’s shade.
- Pay Attention to Surrounding Elements: When whitening teeth, be mindful of surrounding elements like lips and gums. Adjustments should enhance the overall smile without creating unnatural contrasts.
Conclusion:
Whitening teeth in Photoshop is a skill that adds a touch of brilliance to your digital editing repertoire. By understanding the fundamental tools and techniques outlined in this comprehensive guide, you can embark on a journey of enhancing smiles with confidence and precision. As you experiment with various settings and refine your approach, you’ll find yourself effortlessly transforming ordinary smiles into radiant expressions that capture the essence of joy and confidence. Embrace the art of digital teeth whitening, and let your images shine with the luminosity of a captivating and flawless smile.


