Mastering 2D Graphics Creation in Processing: A Comprehensive Guide
Introduction: Processing is a versatile programming language and environment primarily focused on visual arts and creative coding. It’s widely used for creating interactive graphics, animations, and visualizations. Among its many capabilities, Processing excels in the creation of 2D graphics, offering a range of tools and functions to unleash your creativity. In this comprehensive guide, we’ll explore the fundamentals of creating 2D graphics in Processing, from basic shapes and colors to more complex animations and interactions. Whether you’re a beginner or an experienced coder, this guide will help you master the art of 2D graphics creation in Processing.
- Getting Started with Processing: Before diving into 2D graphics creation, you’ll need to set up Processing on your computer. Head to the official Processing website (processing.org) and download the latest version of the software for your operating system. Once installed, launch Processing and create a new sketch by clicking on “File” > “New”. This will open a new blank canvas where you can start coding your 2D graphics masterpiece.
- Drawing Basic Shapes: The foundation of any 2D graphic is its shapes. Processing offers a variety of functions to draw basic shapes such as rectangles, ellipses, lines, and polygons. For example, to draw a rectangle, you can use the
rect()function, specifying the x and y coordinates of the top-left corner, as well as its width and height. Similarly, theellipse()function allows you to draw circles and ovals by specifying the center coordinates and the width and height of the shape. - Adding Colors: Colors play a crucial role in enhancing the visual appeal of your graphics. Processing provides several ways to specify colors, including RGB, HSB, and grayscale. You can use the
fill()function to set the fill color of shapes and thestroke()function to set the outline color. For example,fill(255, 0, 0)sets the fill color to red, whilestroke(0)sets the outline color to black. Experiment with different color combinations to create visually stunning graphics. - Transformations and Translations: Processing allows you to transform and translate shapes using functions such as
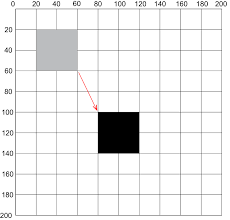
translate(),rotate(), andscale(). These transformations enable you to manipulate the position, rotation, and scale of shapes, allowing for more dynamic and interactive graphics. For example, you can use thetranslate()function to move shapes across the canvas or therotate()function to spin them around a pivot point. - Creating Animations: Animating your 2D graphics adds a layer of interactivity and engagement to your projects. In Processing, animations are achieved by updating the position, size, or appearance of shapes over time. You can use variables to store changing values and update them within the
draw()function, which is called continuously by Processing. Experiment with techniques such as frame-by-frame animation, interpolation, and easing functions to create smooth and captivating animations. - Handling User Interaction: Processing allows you to create interactive graphics that respond to user input such as mouse clicks, keyboard presses, and touch events. You can use functions like
mousePressed(),keyPressed(), andtouchStarted()to detect user actions and trigger specific responses in your code. For example, you can change the color or position of shapes in response to mouse movements or create buttons that react when clicked. - Using Libraries and Extensions: Processing boasts a vibrant community of developers who have created libraries and extensions to extend its capabilities. These libraries provide additional functions and tools for tasks such as physics simulations, particle effects, and data visualization. Some popular libraries for 2D graphics in Processing include
p5.js,Box2D, andPeasyCam. Explore the Processing website and forums to discover new libraries and resources that can enhance your graphics creation workflow. - Optimizing Performance: As your projects become more complex, it’s important to optimize the performance of your code to ensure smooth and responsive graphics. Avoid using heavy computations or nested loops that can slow down your sketches. Instead, optimize your code by reducing redundant calculations, minimizing the number of draw calls, and using techniques such as caching and batching. Additionally, consider using hardware acceleration and optimizing rendering settings to maximize performance.
- Experimenting and Iterating: The beauty of Processing lies in its flexibility and creativity. Don’t be afraid to experiment with different techniques, styles, and ideas in your 2D graphics projects. Iterate on your designs, gather feedback from others, and refine your code to achieve the desired results. Embrace the iterative process of creation, and don’t be discouraged by setbacks or failures. Each iteration brings you closer to realizing your vision and mastering the art of 2D graphics in Processing.
- Conclusion: Creating 2D graphics in Processing offers a rewarding and creative outlet for artists, designers, and programmers alike. By mastering the fundamentals of shapes, colors, transformations, animations, and interactions, you can unleash your creativity and bring your ideas to life on the canvas. Whether you’re a beginner or an experienced coder, Processing provides the tools and resources you need to create stunning and immersive 2D graphics that captivate and inspire audiences. So fire up Processing, let your imagination run wild, and embark on a journey of artistic exploration and discovery in the world of 2D graphics.


