Navigating Clarity: A Comprehensive Guide to Changing Screen Resolution in Windows 7
In the world of computing, visual clarity is paramount. Whether you’re working on intricate design projects, watching high-definition videos, or simply browsing the web, the ability to adjust your screen resolution ensures that your display meets your specific needs and preferences. Windows 7 provides users with a robust set of tools for customizing their display settings, including the option to change screen resolution effortlessly. In this comprehensive guide, we will delve deep into the intricacies of changing screen resolution in Windows 7, providing step-by-step instructions, advanced techniques, and practical insights to help you navigate clarity and optimize your viewing experience.
Understanding Screen Resolution:
Before delving into the process of changing screen resolution, let’s first grasp the concept and significance of this display setting:
- Definition: Screen resolution refers to the number of pixels displayed on the screen horizontally and vertically. It determines the clarity and sharpness of images and text on your display.
- Aspect Ratio: Screen resolution is typically expressed as a combination of horizontal and vertical pixel counts, such as 1920×1080 or 1366×768. The aspect ratio of the display is determined by these pixel dimensions.
- Impact on Display Quality: Higher screen resolutions result in sharper images and text, while lower resolutions may appear pixelated or blurry. Adjusting the screen resolution allows users to optimize display quality based on their preferences and the capabilities of their monitor.
Accessing Display Settings in Windows 7:
Now, let’s explore how to access and navigate display settings in Windows 7:
- Accessing Display Settings:
- Right-click on an empty area of the desktop and select “Screen resolution” from the context menu.
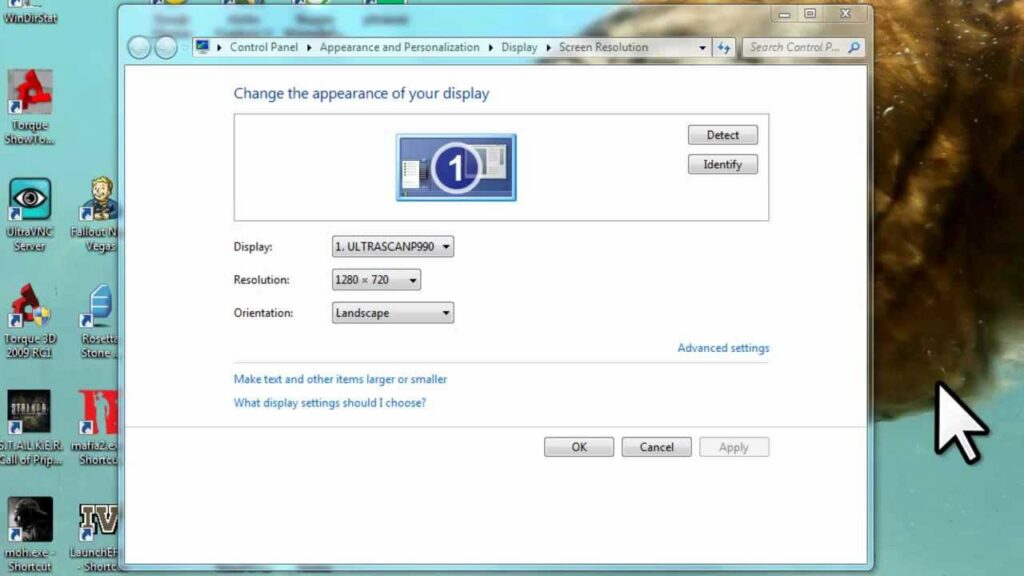
- Alternatively, navigate to “Control Panel” > “Appearance and Personalization” > “Display” to access display settings.
- Navigating Display Settings:
- In the Display settings window, you’ll find options to adjust screen resolution, orientation, and multiple display settings.
Changing Screen Resolution:
Now that we’ve accessed display settings, let’s explore how to change screen resolution in Windows 7:
- Selecting Screen Resolution:
- In the Display settings window, locate the “Resolution” drop-down menu.
- Click on the drop-down menu to view available screen resolutions supported by your monitor.
- Adjusting Screen Resolution:
- Select the desired screen resolution from the drop-down menu. Windows 7 will display a preview of how the selected resolution will appear on your screen.
- Click on “Apply” to apply the new resolution settings.
- Confirming Changes:
- After applying the new resolution settings, Windows 7 will prompt you to confirm the changes. If you’re satisfied with the new resolution, click on “Keep changes.” Otherwise, click on “Revert” to revert to the previous settings.
Advanced Features and Tips:
To further enhance your experience with changing screen resolution in Windows 7, consider the following advanced features and tips:
- Custom Resolutions:
- Some graphics drivers allow users to create custom screen resolutions beyond the standard options available in the drop-down menu. Explore your graphics driver settings to access custom resolution options.
- Multiple Displays:
- If you’re using multiple displays, Windows 7 allows you to adjust the screen resolution independently for each display. Customize resolution settings for each monitor to optimize your workspace.
- Refresh Rate:
- In addition to screen resolution, consider adjusting the refresh rate of your display for smoother motion and reduced eye strain. Higher refresh rates provide smoother visuals, particularly during fast-paced activities such as gaming or video playback.
- Optimizing for Specific Applications:
- Adjust screen resolution settings based on the specific requirements of applications or tasks. For example, increase resolution for detailed design work or decrease resolution for improved performance in gaming.
Conclusion:
Changing screen resolution in Windows 7 provides users with the flexibility to customize their display settings and optimize their viewing experience. By following the comprehensive guide outlined above, users can effectively adjust screen resolution to achieve clarity, sharpness, and optimal display quality based on their preferences and requirements. Whether you’re working on creative projects, enjoying multimedia content, or simply browsing the web, the ability to change screen resolution ensures that your display meets your specific needs and enhances your overall computing experience. So embrace the power of customization, master the art of changing screen resolution in Windows 7, and navigate clarity with confidence and precision.


