Unleashing Typing Potential: A Comprehensive Guide to Changing Keyboard Layouts in Windows XP
Introduction:
The ability to change keyboard layouts in Windows XP is a powerful feature that allows users to customize their typing experience according to their language preferences and regional requirements. Whether switching between different language layouts or adjusting key mappings for specialized keyboards, mastering the process of changing keyboard layouts enhances efficiency and productivity in text input tasks. In this extensive guide, we’ll delve deep into the intricacies of changing keyboard layouts in Windows XP, equipping users with the knowledge and techniques to tailor their typing experience with precision and confidence.
Understanding Keyboard Layouts in Windows XP:
Before diving into the methods for changing keyboard layouts, it’s crucial to understand the concept of keyboard layouts in Windows XP. A keyboard layout refers to the arrangement of keys and characters assigned to each key on a keyboard. Windows XP supports multiple keyboard layouts, each optimized for different languages, scripts, and regional preferences. By changing the keyboard layout, users can switch between different character sets, key mappings, and input methods to accommodate diverse linguistic and cultural needs.
Step-by-Step Guide to Changing Keyboard Layouts:
Now, let’s embark on a systematic journey to change keyboard layouts in Windows XP:
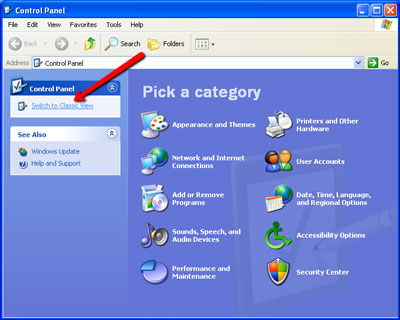
Step 1: Accessing Regional and Language Options:
- Click on the “Start” button located at the bottom-left corner of the screen.
- Navigate to “Control Panel” and double-click to open it.
- In the Control Panel window, locate and open the “Regional and Language Options” icon.
Step 2: Adding Keyboard Layouts:
- In the Regional and Language Options window, navigate to the “Languages” tab.
- Click on the “Details” button in the Text Services and Input Languages section.
- In the Text Services and Input Languages window, click on the “Add” button to add a new keyboard layout.
- Select the desired input language and keyboard layout from the list of available options.
- Click on the “OK” button to confirm the selection and add the keyboard layout to the list of installed input languages.
Step 3: Switching Between Keyboard Layouts:
- After adding multiple keyboard layouts, you can switch between them using keyboard shortcuts or the Language Bar.
- To switch keyboard layouts using keyboard shortcuts, press the “Left Alt” + “Shift” keys simultaneously to cycle through installed keyboard layouts.
- Alternatively, you can use the Language Bar, a floating toolbar that provides quick access to installed input languages and keyboard layouts.
- To enable the Language Bar, check the box next to “Show the Language bar on the desktop” in the Text Services and Input Languages window.
- Once enabled, you can use the Language Bar to switch between keyboard layouts with a single click.
Step 4: Removing Keyboard Layouts:
- If you no longer need a particular keyboard layout, you can remove it from the list of installed input languages.
- In the Text Services and Input Languages window, select the keyboard layout you want to remove from the list.
- Click on the “Remove” button to remove the selected keyboard layout.
- Confirm the removal by clicking on the “Yes” button in the confirmation dialog box.
Advanced Techniques and Tips:
For advanced users or those seeking additional customization options, consider the following techniques and tips:
- Customizing Keyboard Layouts: Explore third-party software tools and utilities that allow for advanced customization of keyboard layouts, including remapping keys, creating custom layouts, and modifying input methods.
- Creating Shortcut Keys: Use the “Key Settings” feature in the Text Services and Input Languages window to assign shortcut keys for switching between keyboard layouts, providing quick access to frequently used layouts.
- Testing Keyboard Layouts: After adding or modifying keyboard layouts, test them in different applications and environments to ensure compatibility and usability.
Conclusion:
In conclusion, changing keyboard layouts in Windows XP is a versatile feature that empowers users to customize their typing experience according to their language preferences and regional requirements. By following the step-by-step guide outlined in this article and considering advanced techniques and tips, users can seamlessly switch between different keyboard layouts, accommodate diverse linguistic needs, and enhance efficiency and productivity in text input tasks on their Windows XP systems. Whether typing in multiple languages, using specialized keyboards, or adapting to different input methods, mastering the process of changing keyboard layouts unlocks a world of possibilities for personalized and efficient typing experiences. So dive into keyboard layout customization today, unleash your typing potential, and tailor your typing experience to perfection on your Windows XP system with ease and efficiency.