Seamless Integration: A Comprehensive Guide to Setting Up a Fax Machine in Windows XP
Introduction:
Setting up a fax machine in Windows XP allows users to send and receive faxes directly from their computer, streamlining communication and document transmission processes. Whether for personal or business use, integrating a fax machine with Windows XP enhances productivity, reduces reliance on traditional fax machines, and simplifies fax management tasks. In this extensive guide, we’ll delve deep into the intricacies of setting up a fax machine in Windows XP, providing users with the knowledge and techniques to establish seamless fax communication with precision and confidence.
Understanding Fax Integration in Windows XP:
Before diving into the setup process, it’s essential to understand the concept of fax integration in Windows XP. Windows XP includes built-in fax functionality that allows users to send and receive faxes using a fax modem or fax-capable all-in-one printer/scanner devices. By configuring fax settings and installing necessary drivers, users can leverage Windows XP’s Fax Service to manage fax communications directly from their computer, eliminating the need for standalone fax machines or external services.
Step-by-Step Guide to Setting Up a Fax Machine in Windows XP:
Now, let’s embark on a systematic journey to set up a fax machine in Windows XP:
Step 1: Verifying Fax Hardware Compatibility:
- Ensure that your computer is equipped with a fax modem or connect a fax-capable all-in-one printer/scanner device to your computer.
- Verify that the fax hardware is compatible with Windows XP and has drivers available for installation.
Step 2: Installing Fax Hardware Drivers:
- Insert the installation CD or download the drivers for your fax hardware from the manufacturer’s website.
- Follow the on-screen prompts to install the fax hardware drivers on your computer.
- Restart your computer if prompted to complete the driver installation process.
Step 3: Configuring Fax Service:
- Click on the “Start” button located at the bottom-left corner of the screen.
- Navigate to “Control Panel” and double-click to open it.
- In the Control Panel window, locate and open the “Printers and Other Hardware” icon.
- Double-click on the “Fax” icon to open the Fax Configuration Wizard.
- Follow the prompts of the Fax Configuration Wizard to configure fax settings, including fax modem detection and setup.
Step 4: Configuring Fax Sending and Receiving Options:
- After configuring fax settings, open the Fax Console by clicking on the “Start” button, selecting “All Programs,” and navigating to “Accessories > Communications > Fax.”
- In the Fax Console window, click on “Tools” in the menu bar and select “Fax Printer Configuration” from the dropdown menu.
- Configure fax sending options, including cover page settings, resolution, and transmission settings.
- Set up fax receiving options, including automatic answering, forwarding, and notification settings.
Step 5: Sending a Fax:
- Open the document or file you want to fax using a compatible application (e.g., Microsoft Word, Adobe Acrobat).
- Click on “File” in the menu bar and select “Print” from the dropdown menu.
- In the Print dialog box, select the fax printer from the list of available printers.
- Configure fax settings, including recipient’s fax number, cover page details, and transmission options.
- Click on the “Print” or “Send” button to send the fax.
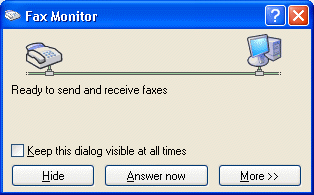
Step 6: Receiving a Fax:
- Ensure that your computer is powered on and connected to the fax line.
- When a fax is received, the Fax Console will automatically detect the incoming fax and display it in the Incoming Fax folder.
- Double-click on the incoming fax to view, print, or save it to your computer.
Advanced Techniques and Tips:
For advanced users or those seeking additional customization options, consider the following techniques and tips:
- Using Fax Templates: Create custom fax cover page templates to personalize fax communications and convey important information.
- Setting up Fax Forwarding: Configure fax forwarding options to automatically forward incoming faxes to another fax machine or email address.
- Managing Fax Logs: Monitor fax activity and track sent and received faxes using the Fax Console’s logging features.
Conclusion:
In conclusion, setting up a fax machine in Windows XP is a straightforward process that allows users to send and receive faxes directly from their computer. By following the step-by-step guide outlined in this article and considering advanced techniques and tips, users can seamlessly integrate fax functionality with Windows XP, streamline communication processes, and enhance productivity in fax management tasks. Whether sending important documents, receiving business contracts, or managing fax communications efficiently, mastering the setup of a fax machine in Windows XP empowers users to stay connected and productive with precision and confidence. So dive into fax integration today, unlock the full potential of fax communication on your Windows XP system, and streamline your document transmission processes with ease and efficiency.


