Mastering the Art of Time: A Comprehensive Guide to Long Exposure Effects in Photoshop
Introduction:
Long exposure photography has the magical ability to transform static scenes into dynamic, ethereal landscapes. While capturing a long exposure photograph traditionally involves a slow shutter speed during the actual shot, the wonders of digital post-processing in Adobe Photoshop open up new possibilities for achieving this mesmerizing effect. In this comprehensive guide, we will delve into the intricacies of creating the long exposure effect in Photoshop, exploring various techniques, tools, and creative approaches to elevate your digital artistry.
Chapter 1: Understanding Long Exposure Photography
- The Essence of Long Exposure:
- Explore the foundational concept of long exposure photography, where a slow shutter speed captures the passage of time, resulting in the blurring of moving elements.
- Typical Long Exposure Subjects:
- Identify subjects that benefit from the long exposure effect, such as flowing water, moving clouds, light trails, and night scenes.
Chapter 2: Capturing Long Exposure Shots
- Camera Settings for Long Exposure:
- Familiarize yourself with the camera settings crucial for capturing long exposure shots, including shutter speed, aperture, and ISO.
- Using Neutral Density Filters:
- Learn about the role of neutral density filters in long exposure photography to control the amount of light entering the camera, allowing for extended exposure times.
Chapter 3: Introduction to Photoshop for Long Exposure Effects
- Importing and Organizing Images:
- Open Adobe Photoshop and import your long exposure images. Organize them into layers for efficient editing.
- Understanding Layers and Blending Modes:
- Grasp the fundamentals of layers and blending modes in Photoshop. Learn how to blend multiple exposures seamlessly to achieve the desired long exposure effect.
Chapter 4: Creating a Faux Long Exposure Effect
- Stacking Layers Technique:
- Use the stacking layers technique to simulate the long exposure effect. Align and blend multiple images, emphasizing the motion of elements within the frame.
- Blurring Motion in Photoshop:
- Experiment with Photoshop’s blur tools to mimic the smoothness associated with long exposure photography. Employ the Motion Blur filter for convincing results.
Chapter 5: Enhancing Specific Long Exposure Elements
- Creating Smooth Water Effects:
- Focus on enhancing water in your images by applying a realistic, smooth, and flowing effect. Utilize brushes and masks for precision.
- Capturing Dynamic Cloud Movements:
- Showcase the drama in the sky by emphasizing cloud movements. Learn to accentuate the dynamic nature of clouds through targeted adjustments.
Chapter 6: Light Trails and Night Photography
- Crafting Luminous Light Trails:
- Dive into the world of light trails by extending and accentuating streaks of light. Use brushes and adjustment layers to create a vivid and captivating scene.
- Night Photography Techniques:
- Explore techniques for enhancing night scenes in Photoshop. Emphasize the stars, city lights, and celestial elements to evoke a surreal and enchanting atmosphere.
Chapter 7: Advanced Techniques for Long Exposure Artistry
- Creating Artistic Blurs:
- Experiment with intentional blurs for artistic expression. Utilize filters, brushes, and layer masks to craft dreamlike and painterly effects.
- Time-Stacking for Unique Results:
- Dive into the advanced technique of time-stacking, where multiple images captured over an extended period are combined to showcase the evolution of a scene.
Chapter 8: Fine-Tuning and Color Grading
- Adjustment Layers for Precision:
- Use adjustment layers to fine-tune exposure, contrast, and color balance. Enhance specific areas while maintaining overall harmony in the long exposure composition.
- Color Grading for Atmosphere:
- Explore color grading techniques to evoke specific moods in your long exposure images. Experiment with toning and color adjustments to achieve a cohesive and atmospheric result.
Chapter 9: Experimenting with Styles and Genres
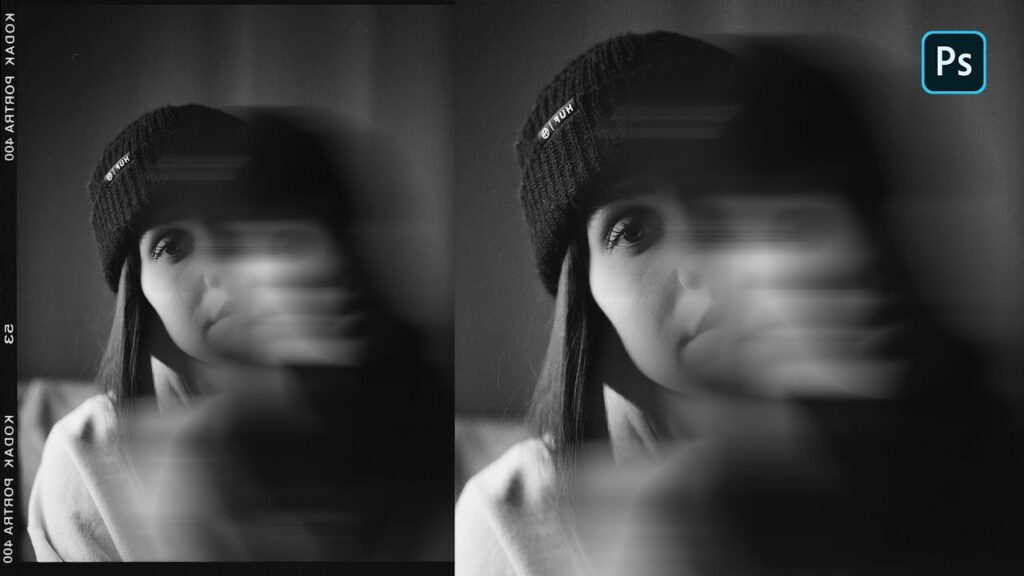
- Applying Long Exposure to Portraits:
- Challenge conventional norms by integrating long exposure effects into portrait photography. Discover techniques to accentuate movement while maintaining focus on the subject.
- Blending Styles:
- Experiment with blending the long exposure effect with other photographic styles. Fuse elements of realism with surrealism for truly unique and captivating compositions.
Chapter 10: Saving and Showcasing Your Long Exposure Masterpieces
- Saving Your Photoshop Project:
- Save your Photoshop project to preserve layers for future edits and refinements.
- Exporting for Display:
- Choose the optimal file format (JPEG, PNG) and resolution for your final image. Export your long exposure masterpiece for sharing on digital platforms, printing, or inclusion in your portfolio.
Chapter 11: Exploring Limitless Creativity
- Continuous Exploration:
- Encourage continuous exploration of long exposure techniques in Photoshop. Challenge yourself to push creative boundaries, experiment with new tools, and refine your skills.
- Community Engagement:
- Engage with the digital art community, share your long exposure creations, and seek inspiration from fellow artists. Participate in discussions, tutorials, and workshops to enhance your craft.
Conclusion:
The long exposure effect in Photoshop is a powerful tool that empowers digital artists to transcend the constraints of traditional photography. This comprehensive guide has equipped you with the knowledge and techniques to harness the magic of long exposure in your digital artistry. Whether you’re capturing the flow of water, streaks of light, or the passage of time, the possibilities are limitless. Embrace the artful fusion of technology and creativity, and let your long exposure masterpieces captivate audiences in the ever-evolving realm of digital art.


