Unleashing the Power: A Comprehensive Guide to Photoshop CS3 Essential Preference Settings
Introduction:
Adobe Photoshop CS3, a landmark release in the evolution of this powerful graphic design software, introduced a multitude of features and tools that transformed the way users approached image editing. Among the key elements that contribute to an efficient and personalized Photoshop experience are the preference settings. In this extensive guide, we will explore the essential preference settings in Photoshop CS3, providing a detailed walkthrough of each option to help users optimize their workflow, enhance productivity, and unlock the full potential of this iconic software.
Opening Preferences in Photoshop CS3:
Before delving into the specific preference settings, it’s crucial to understand how to access them. In Photoshop CS3, preferences can be accessed through the “Edit” menu on Windows or the “Photoshop” menu on macOS. Select “Preferences” and then choose the specific category you wish to explore. Let’s embark on a journey through the essential preference settings that form the backbone of your Photoshop CS3 experience.
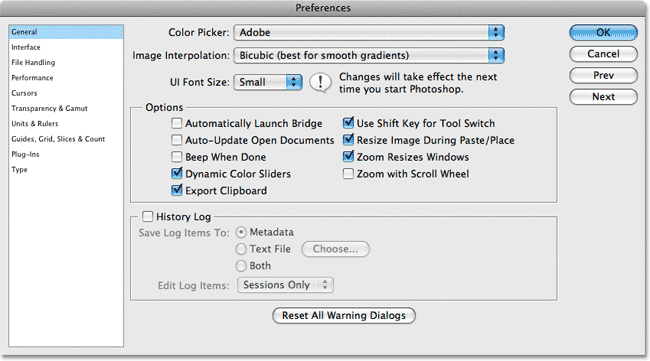
1. General Preferences:
- File Handling: In this section, you can customize settings related to file compatibility, image previews, and the maximum number of recent files displayed.
- Image Interpolation: Choose the default image interpolation method for resizing images. Options include Bicubic, Bilinear, and Nearest Neighbor.
- Type: Configure options related to font previews, anti-aliasing, and font handling.
2. Interface Preferences:
- Color Theme: Personalize your workspace by selecting a color theme for the interface. Choose from options like the default, medium gray, or customize it according to your preference.
- Transparency & Gamut: Adjust transparency grid preferences and set the default color profile for the gamut warning.
- Show Channels in Color: Enable this option to display individual color channels in their respective colors within the Channels panel.
3. File Handling Preferences:
- File Saving Options: Customize settings for file compatibility, image previews, and the default image compression method.
- Image Previews: Adjust the settings for how image previews are displayed in the File Browser or Mini Bridge.
- Maximize PSD and PSB File Compatibility: Choose whether to maximize compatibility when saving PSD and PSB files to ensure compatibility with older versions of Photoshop.
4. Performance Preferences:
- Memory Usage: Allocate the amount of RAM that Photoshop can use. Adjust the sliders based on the available RAM on your system.
- Scratch Disks: Configure the order of preference for using scratch disks. You can choose from multiple hard drives to optimize performance.
- History & Cache: Set the number of history states and cache levels. This influences the number of undo levels available and the performance of certain features like filters.
5. Cursors Preferences:
- Painting Cursors: Customize the appearance of painting cursors based on your preference. Choose from standard, precise, or brush-size cursors.
- Other Cursors: Configure the display of cursors for tools like the Eyedropper or the Spot Healing Brush.
6. Transparency & Gamut Preferences:
- Grid & Guides: Adjust the appearance of grids and guides, including color and style preferences.
- Gamut Warning: Set the warning color for out-of-gamut colors, helping you identify areas that may not reproduce accurately in different output devices.
- Show Channels in Color: Similar to the Interface preferences, enable this option to display individual color channels in their respective colors within the Channels panel.
7. Units & Rulers Preferences:
- Rulers: Customize the units of measurement for rulers, including options for inches, pixels, centimeters, and more.
- Type: Configure settings related to font previews, anti-aliasing, and font handling.
- Column Size: Set the size of columns for the text boxes in the Options Bar.
8. Guides, Grid, & Slices Preferences:
- Guides & Grid: Adjust the color, style, and subdivisions of guides and grids in your workspace.
- Slices: Customize settings related to slices, including the default file format and the color used for slice outlines.
9. Plug-Ins Preferences:
- Enable Generator: Activate the Generator plug-in, which allows you to export image assets from a layered file.
- Additional Plug-Ins Folder: Specify additional folders where Photoshop should look for plug-ins.
10. Type Preferences:
- Font Preview Size: Set the size of font previews in the Type tool options bar.
- Choose Text Engine Options: Select the text engine used for type rendering. The options include Adobe, Apple, and Microsoft.
Conclusion:
Mastering the essential preference settings in Adobe Photoshop CS3 is a crucial step toward unleashing the software’s full potential. By customizing these settings to align with your preferences and workflow requirements, you can significantly enhance your efficiency and creative capabilities. Whether you’re a seasoned professional or a novice exploring the world of digital design, a thorough understanding of these preference settings empowers you to tailor Photoshop CS3 to your unique needs. As you embark on your creative journey, keep experimenting with these settings to discover the optimal configuration that elevates your Photoshop experience to new heights.


