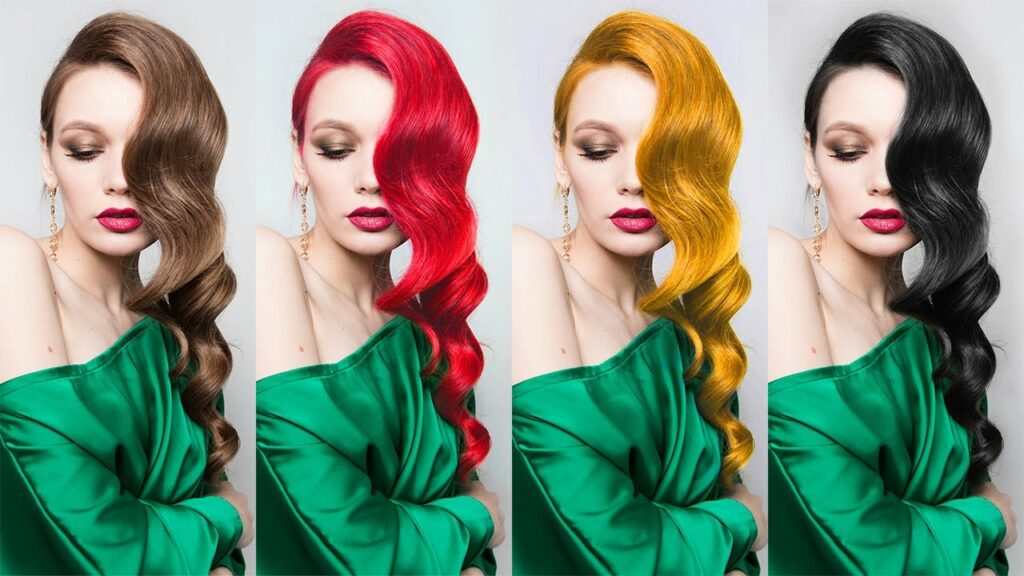
The Art of Digital Transformation: A Comprehensive Guide on How to Change Hair Color in Photoshop

Introduction:
In the realm of digital image manipulation, Adobe Photoshop stands as an unparalleled tool, empowering users to transcend the boundaries of reality and creativity. One captivating and transformative feat within the vast capabilities of Photoshop is the ability to change hair color with precision and artistic flair. Whether you’re looking to experiment with a new look, enhance a portrait, or create fantastical imagery, this comprehensive guide will walk you through the step-by-step process of changing hair color in Photoshop, unveiling the secrets to achieving striking and seamless results.
Understanding the Basics:
Before delving into the intricate steps of changing hair color in Photoshop, it’s essential to acquaint yourself with some fundamental concepts:
- Adobe Photoshop: Photoshop, developed by Adobe, is a powerful graphic design and photo editing software widely used for its versatility in manipulating images.
- Layers and Masks: Understanding the concept of layers is paramount in Photoshop. Working with layers and masks allows for non-destructive editing, enabling changes without altering the original image.
- Selection Tools: Selection tools like the Magic Wand, Lasso, and Brush tools are instrumental for isolating specific areas in an image. Mastery of these tools enhances precision and control during hair color-changing processes.
- Hue/Saturation Adjustment Layer: The Hue/Saturation adjustment layer is a key tool for altering colors in Photoshop. It facilitates modifications to the hue, saturation, and lightness of selected portions of an image, making it ideal for changing hair color.
Now, let’s embark on the step-by-step journey of changing hair color in Photoshop:
Step 1: Open Your Image in Photoshop
a. Launch Photoshop and open the image you wish to work on by navigating to “File” > “Open” and selecting the desired file.
Step 2: Duplicate the Background Layer
a. In the Layers panel, right-click on the Background layer and choose “Duplicate Layer.” This ensures you work on a copy, preserving the original image.
Step 3: Select the Hair Area
a. Utilize the preferred selection tool (e.g., Quick Selection Tool or Magnetic Lasso Tool) to carefully select the hair area. Ensure the selection is precise, covering the entire hair region.
Step 4: Add a Hue/Saturation Adjustment Layer
a. Click on the “New Adjustment Layer” icon at the bottom of the Layers panel and select “Hue/Saturation.”
b. Ensure the adjustment layer is clipped to the hair area by right-clicking on the adjustment layer and choosing “Create Clipping Mask.”
Step 5: Adjust Hue, Saturation, and Lightness
a. Slide the “Hue” slider to shift the color spectrum and choose the desired hair color. Experiment with different hues to achieve the desired effect.
b. Adjust the “Saturation” slider to control the intensity of the new hair color. Be mindful not to over-saturate, maintaining a natural appearance.
c. Fine-tune the “Lightness” slider to match the brightness of the new hair color with the overall image. This step ensures a seamless integration.
Step 6: Refine the Selection with Masks
a. Click on the mask thumbnail of the adjustment layer.
b. Use the Brush Tool with a soft brush and black color to refine the mask. Painting with black conceals the effect, allowing you to clean up any spillage onto surrounding areas.
Step 7: Add Realism with Layer Styles (Optional)
a. To enhance realism, you can add layer styles to simulate reflections and highlights in the hair.
b. Double-click on the adjustment layer to open the Layer Style window. Experiment with options like Inner Glow, Outer Glow, or Bevel and Emboss to add subtle details.
Step 8: Final Touches and Export
a. Fine-tune the overall image, ensuring cohesion between the edited hair and the rest of the photo.
b. Once satisfied, save your work by navigating to “File” > “Save As” or “Export” to preserve the changes in your preferred format.
Advanced Tips for Precision:
- Zoom In for Precision: When making selections or painting masks, zoom in on the hair for a closer view. This enhances precision and allows you to catch intricate details.
- Adjustment Layer Opacity: If the hair color change appears too intense, adjust the opacity of the Hue/Saturation adjustment layer to create a subtle effect.
- Experiment with Blend Modes: Explore different blend modes for the Hue/Saturation adjustment layer to achieve unique effects. Overlay and Soft Light often produce natural-looking results.
- Use a Graphics Tablet: For intricate detailing and precise brushwork, consider using a graphics tablet. It provides a level of control that is challenging to achieve with a mouse.
Conclusion:
Changing hair color in Photoshop is a skill that adds a touch of artistry and creativity to your digital toolkit. By understanding the fundamental tools and techniques outlined in this comprehensive guide, you can embark on a journey of visual transformation and self-expression. As you experiment with various colors, styles, and effects, you’ll unlock the boundless potential of Photoshop, turning your digital canvas into a realm of imaginative possibilities. Embrace the art of digital hair color transformation, and watch as your visions come to life with every brushstroke and adjustment layer.


