Dynamic Design: Changing Text Effect Backgrounds in Photoshop
Introduction:
In the realm of graphic design, the ability to manipulate and customize text effects is paramount for creating visually striking and dynamic compositions. One such versatile skill is the capability to change text effect backgrounds in Adobe Photoshop. This comprehensive guide will walk you through the step-by-step process, empowering you to seamlessly alter and enhance the backgrounds of your text effects, unleashing a world of creative possibilities.
Setting the Creative Context:
Before delving into the technicalities, envision the narrative or mood you want to convey through your text effect. Consider the theme, color scheme, and overall aesthetic of your project. The ability to change text effect backgrounds allows you to adapt and refine your design, making it suitable for diverse applications such as posters, social media graphics, or digital art.
Creating the Canvas:
Open Adobe Photoshop and initiate your creative journey by creating a new document. Choose dimensions that align with your project goals, ensuring that the canvas provides ample space for both the text effect and the background. This blank canvas serves as the foundation upon which your dynamic design will unfold.
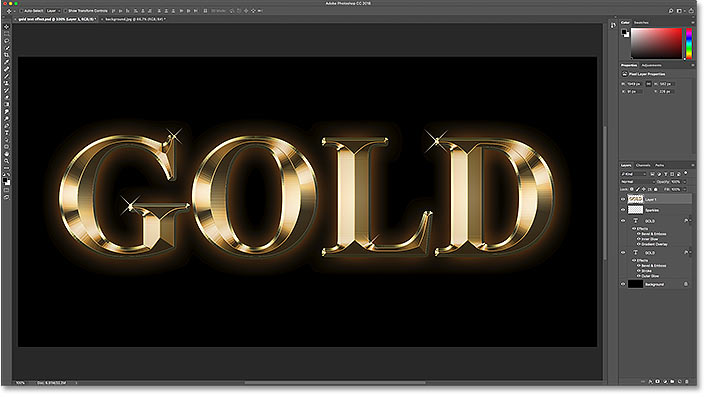
Choosing Fonts and Applying Text Effects:
Font selection plays a pivotal role in conveying the desired tone and style. Opt for fonts that complement your project’s theme and purpose. Once you’ve chosen the text, apply the desired text effect to enhance its visual impact. Photoshop offers a variety of text effects, ranging from shadows and gradients to bevels and glows, each contributing to the overall aesthetic.
Exploring Background Options:
To change the background of your text effect, consider the diverse options available in Photoshop. You can opt for a solid color background, a gradient, or even introduce texture and patterns. Navigate to the Background layer in the Layers panel and experiment with different background styles to find the perfect backdrop for your text.
Utilizing Solid Colors:
A simple yet effective background option is a solid color. Click on the Background layer, choose the Paint Bucket tool, and fill the layer with the desired color. This straightforward approach allows you to create a clean and bold background that complements the text effect. Experiment with different hues to achieve the desired visual impact.
Implementing Gradients:
For a more dynamic and visually appealing background, explore the use of gradients. Click on the Background layer, choose the Gradient tool, and select the desired gradient style. Drag the tool across the canvas to apply the gradient, introducing a smooth transition of colors. Gradients add depth and dimension to your design, enhancing the overall aesthetic.
Introducing Textured Backgrounds:
To infuse character and uniqueness into your design, consider textured backgrounds. Create a new layer above the Background layer, import a texture, and adjust its size and position. Experiment with blending modes to seamlessly integrate the texture with the background. Textured backgrounds add a tactile quality and visual interest to your text effect.
Incorporating Patterns:
Another creative option is using patterns as backgrounds. Create a new layer above the Background layer, choose the Pattern Overlay option in the Layer Style panel, and select a pattern from the available presets. Adjust the scale and opacity to fine-tune the pattern’s appearance. Patterns bring intricacy and detail to the background, creating a visually rich canvas for your text effect.
Applying Layer Styles to Background:
Elevate the background further by applying layer styles. Double-click on the Background layer to access the Layer Style panel and experiment with options such as Drop Shadow, Outer Glow, or Stroke. Layer styles add depth and dimension to the background, enhancing its interaction with the text effect.
Incorporating Image Backgrounds:
For a more immersive and thematic background, consider incorporating images. Open the desired image in Photoshop, drag it onto your canvas, and position it accordingly. Experiment with blending modes and opacity levels to seamlessly integrate the image with the text effect. Image backgrounds provide context and narrative to your design.
Adjusting Text and Background Harmony:
As you change the background, ensure that it complements the text effect harmoniously. Fine-tune the color contrast, adjust opacity levels, or experiment with blending modes to achieve a balanced and cohesive visual composition. The interplay between text and background should enhance the overall impact of your design.
Saving and Exporting:
Once satisfied with your dynamic design, save the Photoshop (.PSD) file to retain all layers, styles, and editability. For sharing or use in other projects, export your design as a high-quality image file (.JPEG, .PNG) to showcase the seamless integration of text and background.
Conclusion:
Changing text effect backgrounds in Photoshop is a testament to the program’s flexibility and your creative control. By customizing backgrounds, you can adapt your design to different themes, moods, and applications. Whether you’re creating bold posters, engaging social media graphics, or intricate digital art, this skill allows you to craft visually captivating compositions with ease.
So, immerse yourself in the realm of dynamic design, experiment with text effects and background variations, and watch as your creative vision comes to life. With Adobe Photoshop as your creative ally, the ability to change text effect backgrounds becomes a powerful tool for expressing your unique style and elevating the impact of your visual storytelling.


