A Comprehensive Guide to Attaching Garden Hose Fittings: Navigating the Flow with Precision and Ease

Introduction:
In the world of gardening and outdoor maintenance, a garden hose is a versatile and indispensable tool. However, its effectiveness is heavily reliant on properly attached fittings. Whether you’re a seasoned gardener or a novice tending to your outdoor oasis, understanding how to attach garden hose fittings is a fundamental skill. In this exhaustive guide, we’ll explore the diverse types of garden hose fittings, step-by-step instructions for attaching them, and valuable tips to ensure a seamless flow of water for all your gardening needs.
Types of Garden Hose Fittings:
Before delving into the attachment process, it’s essential to familiarize yourself with the various types of garden hose fittings available:
- Hose Bibb or Spigot:
This is the outdoor faucet to which you connect your garden hose. It is typically located on the exterior of a building and serves as the starting point for your hose setup.
- Quick Connectors:
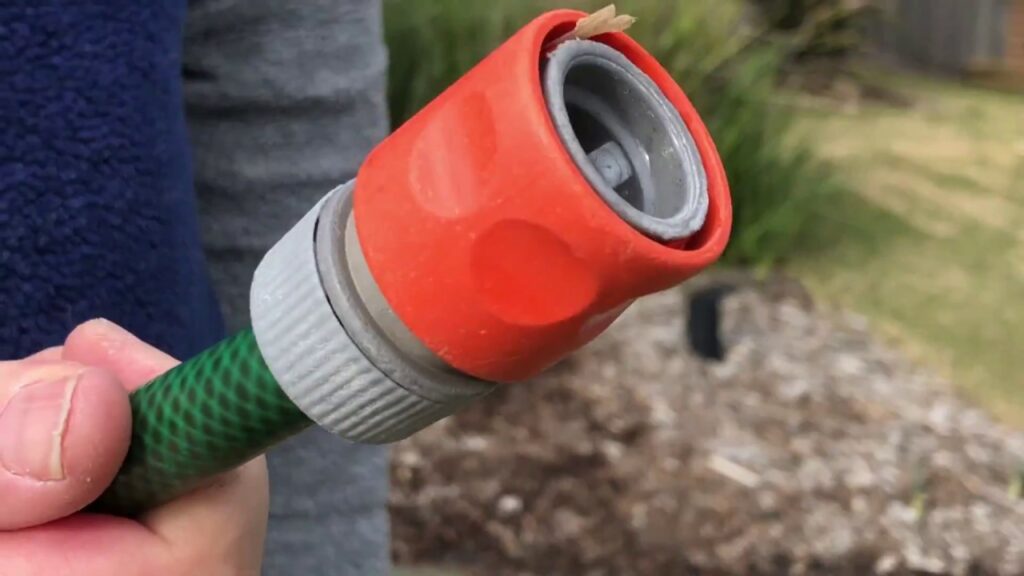
Quick connectors are convenient fittings that allow you to easily connect and disconnect hoses, sprinklers, or other watering tools without the need for twisting or threading. They come in various styles but often involve a male and female part that snaps together.
- Hose Couplings:
Hose couplings are connectors that join two hoses together, extending the reach of your watering system. They are available in both plastic and metal options.
- Threaded Connectors:
Threaded connectors, often used for hose bibbs and some attachments, involve screwing the male and female parts together. These fittings come in various sizes and thread patterns.
- Spray Nozzles and Wands:
These are attachments that control the flow and pattern of water, allowing you to customize your watering experience. They often come with adjustable settings for different spray patterns.
Step-by-Step Guide to Attaching Garden Hose Fittings:
Step 1: Inspect and Prepare
- Inspect Hose and Fittings:
Before attaching fittings, inspect the garden hose and fittings for any damage, such as cracks, leaks, or worn-out gaskets. Replace any faulty components to ensure a secure connection.
- Check Compatibility:
Ensure that the fittings you have are compatible with each other and with the hose bibb. Check for matching thread patterns, and confirm that quick connectors, couplings, and other attachments are designed to work together.
Step 2: Attach Hose Bibb or Spigot
- Check the Hose Bibb Threads:
Examine the threads on the hose bibb or spigot to ensure they are clean and undamaged. If needed, clean the threads using a wire brush or an old toothbrush.
- Apply Thread Seal Tape:
Wrap the threads of the hose bibb or spigot with thread seal tape in a clockwise direction. This tape helps create a watertight seal and prevents leaks.
- Attach the Garden Hose:
Screw the female end of the garden hose onto the hose bibb or spigot in a clockwise direction. Tighten the connection by hand, and use pliers to give it a final snug turn. Be cautious not to overtighten, as it may damage the threads.
Step 3: Use Quick Connectors
- Prepare Quick Connectors:
If using quick connectors, attach the male connector to the hose bibb or spigot and the female connector to the garden hose. Ensure a secure snap-fit connection.
- Quick Connect and Disconnect:
To use, simply snap the connectors together. When disconnecting, push back the collar on the female connector and pull the male connector out.
Step 4: Attach Hose Couplings
- Select Compatible Couplings:
Choose hose couplings that match the diameter of your hoses. Couplings typically have male and female parts that screw together.
- Screw Hose Couplings:
Screw the male end of one hose into the female end of another hose. Ensure a tight connection by turning the couplings clockwise. Use pliers if necessary, but avoid overtightening.
Step 5: Use Threaded Connectors
- Match Thread Patterns:
Ensure that the threaded connectors match the thread pattern of the hose bibb or spigot. Common thread patterns include GHT (Garden Hose Thread) and NPT (National Pipe Thread).
- Thread the Connectors:
Screw the male end of the threaded connector into the female end of the hose bibb or spigot. Turn it clockwise until snug. Use pliers if needed, but exercise caution not to damage the threads.
Step 6: Attach Spray Nozzles or Wands
- Choose Compatible Attachments:
Select spray nozzles or wands that fit the hose you are using. Attachments typically have a threaded end that screws onto the male end of the hose or a quick connector for easy attachment.
- Screw or Snap Attachments:
Depending on the type of attachment, either screw it onto the hose using clockwise turns or snap it onto a quick connector if applicable.
Step 7: Test for Leaks
- Turn On the Water:
Turn on the water at the hose bibb or spigot to test the connections. Check for any leaks at the fittings, hose couplings, or attachments.
- Tighten if Necessary:
If you notice any leaks, tighten the connections further. Be cautious not to overtighten, as it may cause damage. Reapply thread seal tape if needed.
Valuable Tips for Successful Attachment:
- Regular Maintenance:
Periodically inspect and maintain your garden hose and fittings. Replace damaged gaskets, clean threads, and lubricate quick connectors to ensure smooth operation.
- Avoid Cross-Threaded Connections:
When attaching threaded connectors, ensure that the threads align properly. Avoid cross-threading, as it can damage the threads and compromise the seal.
- Use Lubrication:
Apply a small amount of lubricant to threaded connections to make attaching and detaching fittings smoother. This can also help prevent damage to the threads over time.
- Choose Quality Fittings:
Invest in high-quality fittings to ensure durability and longevity. Quality fittings are less likely to leak, corrode, or break over time.
- Store Hoses Properly:
Store hoses indoors or in a shaded area when not in use to prevent exposure to extreme temperatures, UV rays, and harsh weather conditions that can degrade hoses and fittings.
- Consider Hose Hangers:
Use hose hangers or reels to store hoses neatly. This prevents kinks, tangles, and potential damage to the hose and fittings.
Conclusion:
Attaching garden hose fittings is a skill that empowers outdoor enthusiasts to efficiently water plants, wash cars, and maintain outdoor spaces. By understanding the types of fittings available, following a systematic attachment process, and implementing valuable tips for success, you can ensure a seamless flow of water for all your gardening and outdoor needs. As you master the art of attaching garden hose fittings, you not only enhance the functionality of your tools but also contribute to the overall health and vibrancy of your outdoor haven. Embrace the knowledge provided in this comprehensive guide, and let the waters of precision and ease flow through your gardening endeavors.


