Mastering the Art of Texture: A Comprehensive Guide on How to Achieve a Knockdown Texture
Introduction:
Adding texture to walls can elevate the aesthetic appeal of a space, creating visual interest and a unique tactile experience. One popular texturing technique is the knockdown texture, known for its subtle, mottled finish that imparts depth and character to walls. In this comprehensive guide, we will explore the step-by-step process of achieving a knockdown texture, from preparation to application, providing detailed insights and tips for creating a professional-looking finish.
Understanding Knockdown Texture:
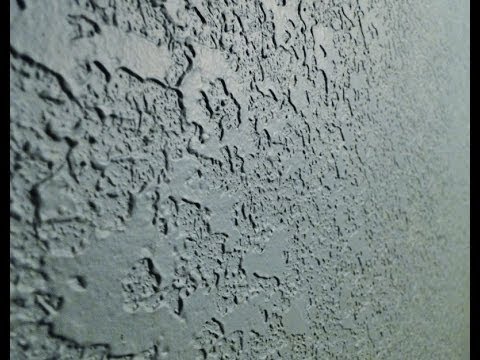
A knockdown texture is characterized by its partially flattened or “knocked down” appearance, which results in a textured surface with a combination of smooth and textured areas. This technique is often used to disguise imperfections on walls, add visual interest, and create a sophisticated, textured finish. The process involves applying a joint compound or texture mix to the wall, then using a trowel or other tools to flatten and partially smooth the texture, leaving behind a visually pleasing pattern.
Materials and Tools:
Before embarking on the knockdown texture application, gather the necessary materials and tools:
- Joint Compound or Texture Mix:
Choose a joint compound or pre-mixed texture product suitable for your project. Consider the desired level of texture and the manufacturer’s recommendations.
- Paint Sprayer or Roller:
A paint sprayer is the preferred tool for applying the texture evenly. However, if a sprayer is not available, a thick-nap roller can be used as an alternative.
- Trowel:
A knockdown knife or trowel with an adjustable handle is essential for achieving the desired texture. The size of the trowel determines the size of the texture pattern.
- Mixing Tools:
Ensure you have mixing tools such as a drill with a mixing attachment or a mixing paddle to prepare the joint compound or texture mix.
- Painter’s Tape and Plastic Sheeting:
Use painter’s tape to protect adjacent surfaces and trim, and cover floors and furniture with plastic sheeting to prevent texture overspray.
- Safety Gear:
Wear safety gear, including goggles and a mask, to protect yourself from dust and potential airborne particles during the texturing process.
Step-by-Step Guide to Achieving a Knockdown Texture:
Step 1: Prepare the Surface
- Clean the Surface:
Begin by cleaning the wall surface to ensure it is free of dust, dirt, and grease. A clean surface promotes better adhesion of the texture.
- Repair Imperfections:
Patch any holes, cracks, or imperfections on the wall with joint compound. Allow the compound to dry completely before proceeding.
Step 2: Protect Surrounding Areas
- Cover Floors and Furniture:
Protect floors and furniture by covering them with plastic sheeting. Secure the sheeting in place with painter’s tape.
- Mask Adjacent Surfaces:
Use painter’s tape to mask off adjacent surfaces, such as trim, ceilings, and other areas where you do not want the texture to be applied.
Step 3: Mix the Joint Compound or Texture Mix
- Read Manufacturer’s Instructions:
Follow the manufacturer’s instructions on the joint compound or texture mix packaging for mixing ratios and consistency.
- Mix Thoroughly:
Use a drill with a mixing attachment or a mixing paddle to thoroughly mix the joint compound or texture mix until it reaches a smooth, lump-free consistency.
Step 4: Apply the Texture
- Load the Sprayer or Roller:
If using a paint sprayer, load it with the mixed joint compound or texture mix. If using a roller, dip it into the mix and apply it to the wall evenly.
- Spray or Roll the Texture:
Begin applying the texture to the wall in a consistent and even manner. Work in sections, ensuring the texture is uniformly distributed.
Step 5: Knock Down the Texture
- Wait for Partial Drying:
Allow the applied texture to partially dry. The drying time will vary based on environmental conditions, but typically it takes around 10-20 minutes.
- Use the Knockdown Knife:
Once the texture is partially dry, use a knockdown knife or trowel to flatten and smooth the raised areas. Hold the trowel at a slight angle and gently drag it across the textured surface.
Step 6: Finishing Touches
- Blend the Edges:
Blend the edges of each knocked-down area to create a seamless transition between the smooth and textured portions of the wall.
- Inspect for Consistency:
Step back and inspect the entire wall for consistency. Touch up any areas that may need additional texture or smoothing.
Step 7: Allow the Texture to Dry
- Complete Drying Time:
Allow the knockdown texture to dry completely. This may take several hours or overnight, depending on the thickness of the applied texture.
- Evaluate the Finish:
Once dry, evaluate the finish and make any final touch-ups if needed. The texture should have a uniform appearance with a pleasing blend of smooth and textured areas.
Conclusion:
Achieving a knockdown texture requires careful preparation, the right materials, and a methodical approach. Whether you’re looking to refresh the appearance of your walls or add a touch of sophistication to a room, mastering the art of knockdown texture application allows you to transform spaces with a visually appealing and textured finish. By following this comprehensive guide, you can confidently embark on the journey of creating a knockdown texture that enhances the aesthetics of your living spaces, bringing depth and character to your walls.


