Your Comprehensive Guide to Creating an Amazon Seller Account
Creating an Amazon seller account opens up a world of opportunity for individuals and businesses looking to sell products online. With access to millions of customers around the globe, Amazon provides a powerful platform for reaching new markets and growing your business. In this comprehensive guide, we’ll walk you through the step-by-step process of creating an Amazon seller account, from start to finish.
Step 1: Navigate to Amazon Seller Central
To begin the process of creating an Amazon seller account, navigate to the Amazon Seller Central website. You can do this by typing “seller central” into your preferred search engine or by directly visiting the Seller Central homepage at sellercentral.amazon.com.
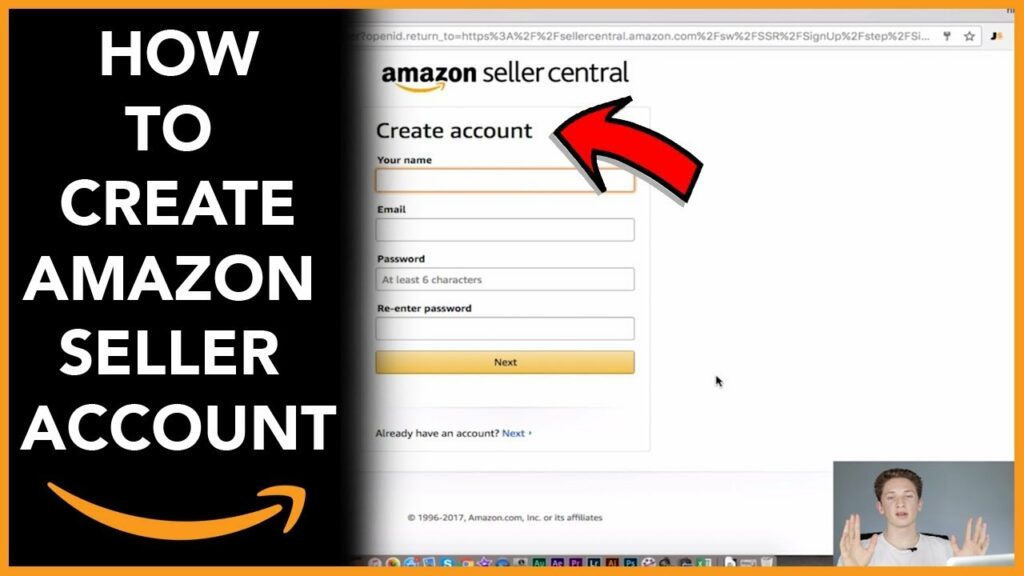
Step 2: Sign In or Create a New Account
Once you’ve arrived at the Seller Central homepage, you’ll be prompted to sign in with your existing Amazon account or create a new one. If you already have an Amazon account, simply enter your email address and password and click “Sign in.” If you don’t have an Amazon account, click on the “Create your Amazon account” button to proceed to the registration page.
Step 3: Enter Your Business Information
If you’re creating a new Amazon account, you’ll need to provide some basic information about your business. This includes your legal name, business name (if different), email address, and phone number. You’ll also be asked to create a password for your account and agree to Amazon’s terms and conditions.
Step 4: Verify Your Email Address
After entering your business information, Amazon will send a verification email to the address you provided. Check your email inbox for a message from Amazon and click on the verification link to confirm your email address. Once your email address has been verified, you’ll be able to proceed to the next step.
Step 5: Provide Your Billing Information
Next, you’ll need to provide billing information for your Amazon seller account. This includes your billing address and payment method. Amazon accepts most major credit and debit cards, as well as bank account transfers for certain transactions. You’ll also have the option to set up automatic payments for your seller fees, or you can choose to pay manually each month.
Step 6: Complete the Tax Interview
As part of the account setup process, Amazon requires all sellers to complete a tax interview to determine their tax obligations. This interview will ask you to provide information about your business structure, tax identification number (such as an EIN or Social Security Number), and tax classification. Depending on your location and business structure, you may also need to provide additional documentation to verify your tax status.
Step 7: Set Up Your Seller Profile
Once you’ve completed the tax interview, you’ll have the opportunity to set up your seller profile. This includes providing information about your business, such as your company logo, a brief description of your products or services, and links to your website or social media profiles. You’ll also have the option to customize your seller storefront and add additional features, such as product videos or enhanced brand content.
Step 8: Choose Your Selling Plan
Amazon offers two selling plans for sellers: the Individual plan and the Professional plan. The Individual plan is best suited for casual or occasional sellers who plan to list fewer than 40 items per month, while the Professional plan is designed for businesses and high-volume sellers who plan to list more than 40 items per month. Choose the plan that best fits your needs and budget, keeping in mind that the Professional plan includes additional features and benefits, such as access to bulk listing tools and discounted selling fees.
Step 9: Start Listing Your Products
With your Amazon seller account now set up, you’re ready to start listing your products for sale. Navigate to the “Inventory” tab in Seller Central and click on “Add a Product” to begin creating your listings. You’ll need to provide detailed information about each product you wish to sell, including its title, description, price, and images. You’ll also have the option to set up shipping settings, inventory levels, and fulfillment options for each product.
Step 10: Launch Your Listings and Start Selling
Once you’ve created your product listings, you’re ready to launch your Amazon store and start selling to customers around the world. Monitor your sales performance and adjust your listings as needed to optimize your results. With dedication, hard work, and a strategic approach, you can build a successful business on Amazon and achieve your goals as a seller in the world’s largest online marketplace.