Mastering Smooth Transitions: A Comprehensive Guide to Utilizing the Blend Tool in Adobe Illustrator
Adam.Smith May 1, 2024 0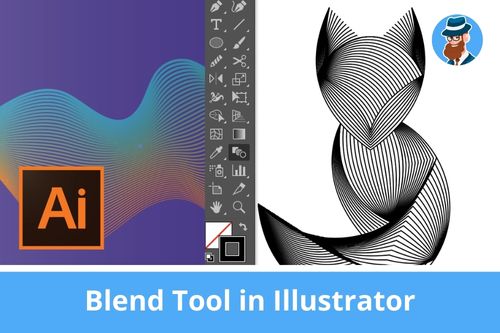
Introduction:
In the vast landscape of digital design, Adobe Illustrator stands as a beacon of creativity, offering a plethora of tools and features to empower artists, designers, and creators. Among its arsenal of capabilities, the Blend Tool emerges as a versatile instrument, providing users with the ability to create smooth transitions, gradients, and effects with ease and precision. Whether you’re a seasoned illustrator, a graphic designer, or an aspiring artist, mastering the art of using the Blend Tool in Adobe Illustrator opens up a world of possibilities for creating captivating artwork, dynamic illustrations, and striking designs. In this comprehensive guide, we’ll embark on a journey to explore the techniques and tools needed to harness the power of the Blend Tool, empowering you to create seamless transitions and stunning effects with confidence and creativity.
Chapter 1: Understanding the Blend Tool
At its core, the Blend Tool in Adobe Illustrator is a transformative feature that allows users to create smooth transitions between two or more objects or shapes. Whether you’re blending colors, shapes, or gradients, the Blend Tool enables you to achieve seamless transitions and striking effects with precision and control. Understanding the principles of using the Blend Tool, including anchor points, paths, and spacing options, lays the foundation for effectively harnessing its power to create visually compelling artwork.
Chapter 2: Navigating the Blend Tool Options
Before delving into the creative process, it’s essential to familiarize yourself with the various options and settings available for the Blend Tool in Adobe Illustrator. The Blend Tool panel provides a range of options for customizing the behavior and appearance of the tool, such as blend steps, smooth color, and specified distance. Experiment with adjusting settings such as spacing, orientation, and alignment to achieve the desired effect. Additionally, explore the Blend Tool preferences in the Adobe Illustrator settings to customize default settings such as blend tolerance and object ordering.
Chapter 3: Creating Basic Blends
With your document open in Adobe Illustrator, it’s time to start creating basic blends using the Blend Tool. Select two or more objects or shapes that you want to blend together, then activate the Blend Tool from the toolbar or by pressing W on your keyboard. Click on the first object to set it as the starting point of the blend, then click on the second object to set it as the ending point. Adobe Illustrator will automatically create a smooth transition between the two objects, creating a blend that seamlessly transitions from one shape to another. Experiment with adjusting the spacing and orientation options to control the appearance of the blend, allowing for smooth and fluid transitions.
Chapter 4: Creating Complex Blends
Once you’ve mastered the basics of creating basic blends, it’s time to start experimenting with more complex blends in Adobe Illustrator. Select multiple objects or shapes that you want to blend together, then activate the Blend Tool and click on the first object to set it as the starting point. Continue clicking on each subsequent object to add them to the blend, creating a smooth transition between each shape. Experiment with adjusting the spacing and orientation options to control the appearance of the blend, allowing for intricate and dynamic effects.
Chapter 5: Using Colors and Gradients
In addition to blending shapes, Adobe Illustrator allows users to blend colors and gradients using the Blend Tool. Select two or more objects with different fill colors or gradients, then activate the Blend Tool and click on the first object to set it as the starting point. Click on the second object to set it as the ending point, and Adobe Illustrator will automatically create a smooth transition between the colors or gradients, creating a blend that seamlessly transitions from one color or gradient to another. Experiment with adjusting the smooth color option to control the appearance of the blend, allowing for seamless transitions and striking color effects.
Chapter 6: Applying Transparency and Opacity
In addition to blending shapes and colors, Adobe Illustrator offers the ability to blend transparency and opacity using the Blend Tool. Select two or more objects with different levels of transparency or opacity, then activate the Blend Tool and click on the first object to set it as the starting point. Click on the second object to set it as the ending point, and Adobe Illustrator will automatically create a smooth transition between the transparency or opacity levels, creating a blend that seamlessly transitions from one level to another. Experiment with adjusting the spacing and orientation options to control the appearance of the blend, allowing for subtle and nuanced transparency effects.
Chapter 7: Exploring Advanced Blend Techniques
In addition to basic blending techniques, Adobe Illustrator offers a variety of advanced techniques and effects for creating complex blends and dynamic illustrations. Experiment with using different blend modes, such as multiply, screen, and overlay, to create unique and striking effects. Practice combining blends with other design elements such as gradients, patterns, and textures to create visually compelling compositions. Consider using blends as accents or embellishments to add depth and visual interest to your artwork, or use them as the primary focus to create bold and expressive designs that command attention.
Chapter 8: Saving and Sharing Artwork with Blends
Once you’ve created your blend in Adobe Illustrator, it’s important to save and share your artwork for sharing or distribution. Save your Illustrator document in a compatible file format, such as AI or PDF, to preserve the vector properties of your artwork. If you’re creating artwork for web or screen-based applications, consider exporting it as an SVG file for scalability and compatibility with web browsers. For print-based projects, export your artwork as a high-resolution raster image in formats such as JPEG or PNG.
Conclusion:
Mastering the Blend Tool in Adobe Illustrator is a journey of exploration and experimentation, offering endless possibilities for creating seamless transitions and striking effects with precision and control. By understanding the techniques and tools needed to navigate Blend Tool options and settings, create basic and complex blends, blend colors and gradients, blend transparency and opacity, explore advanced blend techniques, and save and share artwork with blends, you’ll be able to create stunning designs that captivate and inspire viewers. So grab your stylus, set your sights on the canvas, and let Adobe Illustrator become your trusted ally for bringing your creative visions to life with smooth transitions and striking effects.