Mastering the Art of Pinning Websites to Windows 10 Start Menu: A Comprehensive Guide for Users
Introduction: In today’s digital age, our web browsers serve as gateways to the vast expanse of information available on the internet. With Windows 10, Microsoft has introduced a convenient feature that allows users to pin their favorite websites directly to their Start menu, providing quick and easy access to frequently visited sites. In this comprehensive guide, we’ll explore the process of pinning websites in Windows 10’s Start menu, step-by-step instructions for doing so, and additional tips and tricks to enhance your browsing experience. Whether you’re a novice user or a seasoned Windows aficionado, mastering the art of pinning websites to the Start menu will streamline your workflow and improve your productivity.
Understanding the Benefits of Pinning Websites to the Start Menu: Before delving into the specifics of how to pin a website to the Start menu in Windows 10, it’s essential to understand the advantages of utilizing this feature:
- Quick Access: Pinning a website to your Start menu provides instant access to your favorite webpages directly from the Windows desktop, eliminating the need to open your web browser and type in the URL manually.
- Streamlined Workflow: By organizing your most frequently visited websites on your Start menu, you can streamline your workflow and save time navigating between tabs and windows, improving efficiency and productivity.
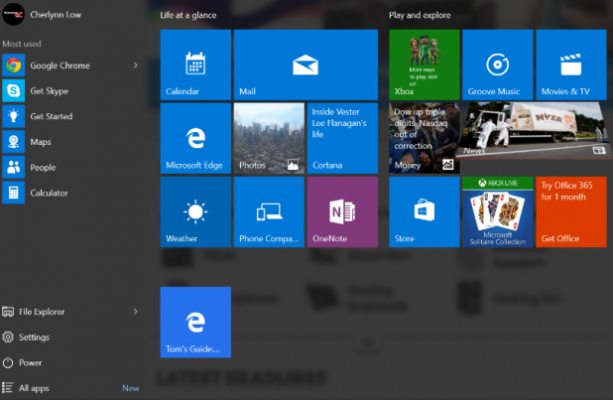
- Visual Organization: The Start menu offers a visually appealing and organized interface for accessing applications, files, and now, pinned websites. You can customize the layout and arrangement of pinned items to suit your preferences and browsing habits.
- Enhanced Productivity: Quick access to essential websites such as email, productivity tools, or news sites from the Start menu can boost your productivity and efficiency, allowing you to stay focused and on task.
Now that we’ve explored the benefits of pinning websites to the Start menu, let’s dive into the step-by-step process:
How to Pin a Website to Windows 10 Start Menu: Follow these simple steps to pin your favorite websites to your Windows 10 Start menu:
- Open Your Web Browser:
- Launch your preferred web browser (e.g., Microsoft Edge, Google Chrome, Mozilla Firefox) on your Windows 10 computer.
- Navigate to the Website:
- Enter the URL of the website you want to pin into the address bar and press Enter to navigate to the site.
- Access the Three-Dot Menu:
- Once the website loads, look for the three-dot menu icon located in the top-right corner of the browser window (or the menu icon specific to your browser). Click on this icon to access the browser’s menu options.
- Select “More Tools” and “Pin to Start”:
- From the dropdown menu, hover over the “More tools” submenu to reveal additional options. Select “Pin to Start” from the submenu to initiate the pinning process.
- Confirm the Pinning Action:
- A confirmation dialog box will appear, asking you to confirm the action of pinning the website to your Start menu. Click “Yes” or “Pin” to confirm and complete the process.
- Access the Pinned Website from Start Menu:
- Once pinned, the website’s icon will appear on your Windows 10 Start menu alongside other pinned apps and shortcuts. Simply click on the icon to open the website directly in your default web browser.
Additional Tips for Pinning Websites to Windows 10 Start Menu: To further enhance your experience of pinning websites to the Start menu in Windows 10, consider the following tips and tricks:
- Customize Tile Size and Position:
- Right-click on the pinned website tile in the Start menu to access customization options such as resizing, moving, or unpinning the tile. You can resize the tile to small, medium, or wide, and drag it to your preferred position within the Start menu layout.
- Organize Pinned Websites into Groups:
- Create custom groups or folders within the Start menu to organize and categorize your pinned websites based on themes, interests, or frequency of use. Simply drag and drop tiles to create groups and improve visual organization.
- Sync Pinned Websites Across Devices:
- If you use multiple Windows 10 devices, take advantage of the syncing feature to ensure consistency across devices. Pinned websites on one device will automatically sync to other devices linked to your Microsoft account, providing a seamless browsing experience.
- Utilize Live Tile Updates:
- Some websites offer live tile updates, allowing dynamic content or notifications to be displayed directly on the Start menu tile. Take advantage of this feature to stay informed and up-to-date on news, weather, or other relevant information.
Conclusion: In conclusion, pinning websites to the Start menu in Windows 10 is a convenient and practical way to access your favorite webpages directly from the desktop. By following the step-by-step instructions outlined in this guide and implementing additional tips and tricks, you can customize your Start menu layout, improve visual organization, and enhance your browsing experience on Windows 10. Whether you’re a casual user or a power user, mastering the art of pinning websites to the Start menu will revolutionize the way you navigate the internet on your Windows 10 device. So, why wait? Start pinning your favorite websites to the Start menu today and unlock the full potential of your browsing experience in Windows 10!