Nostalgic Revival: A Comprehensive Guide to Mastering the Retro Photo Effect in Photoshop
Introduction:
The allure of the retro aesthetic, with its distinctive colors, grainy textures, and timeless charm, continues to captivate artists and photographers alike. The ability to evoke a sense of nostalgia and transport viewers to a bygone era is a powerful creative tool. In this extensive guide, we’ll unravel the step-by-step process of creating a compelling retro photo effect in Photoshop. Whether you’re an enthusiast, a designer, or a seasoned photographer, this comprehensive tutorial will empower you to infuse your digital images with the warmth and character reminiscent of vintage photographs.
1. Choosing the Right Image: Setting the Mood:
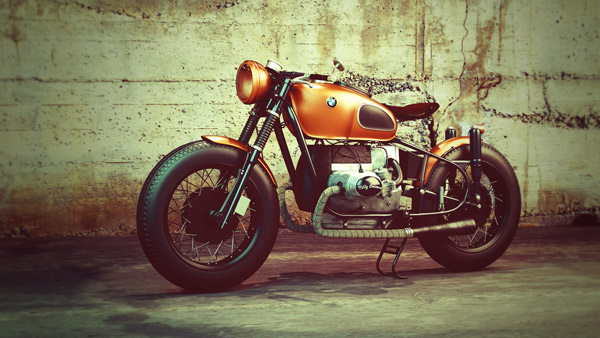
The foundation of any successful retro photo effect lies in selecting the right image. Look for photographs with a composition or subject matter that complements the vintage vibe you want to achieve. Consider images with classic cars, vintage fashion, or timeless landscapes.
2. Creating a Vintage Color Palette: Adjusting Saturation and Tones:
Begin by adjusting the color palette to emulate the distinctive hues of retro photographs. Decrease overall saturation to soften the vibrancy, and experiment with individual color channels to achieve muted tones. Infuse warm tones, such as sepia or ochre, to replicate the warmth associated with aged photographs.
3. Introducing Film Grain and Texture: Adding Authenticity:
To mimic the grainy texture of vintage film, introduce film grain to your image. Photoshop provides various methods, including the Grain filter and noise overlays, to emulate the imperfections characteristic of older photographs. Experiment with the intensity and size of the grain to find the right balance for your image.
4. Vignette Effect: Focusing Attention:
Create a subtle vignette effect to draw the viewer’s attention towards the center of the image. This darkened border not only adds a touch of drama but also replicates the natural vignetting often present in vintage photographs. Use the Lens Correction filter or layer masks to achieve a soft and gradual vignette.
5. Applying Sepia Tones: Capturing Timelessness:
Sepia tones are synonymous with vintage photography and can instantly transport an image to the past. Apply a sepia filter to infuse warmth and timelessness into your photograph. Adjust the intensity to strike the right balance between nostalgia and visual appeal.
6. Emulating Light Leaks: Adding Artistic Flair:
Simulate the effect of light leaks commonly found in vintage film photography. Create a new layer, apply colorful gradients, and set the blending mode to Screen or Overlay. Experiment with different gradient shapes and opacities to introduce a subtle and organic light leak effect.
7. Old-Fashioned Photo Borders: Framing the Past:
Enhance the retro feel by adding borders reminiscent of traditional photo prints. Create a new layer, fill it with a neutral color, and use the Rectangular Marquee Tool to create a border. Experiment with rounded corners, uneven edges, or even torn paper effects to amplify the vintage aesthetic.
8. Softening and Aging: Mimicking Wear and Tear:
Replicate the natural wear and tear associated with old photographs. Apply a slight blur to soften the image and reduce the overall sharpness. Experiment with the Levels adjustment to mimic the gradual fading that occurs over time, giving your image an authentic aged appearance.
9. Adding Vintage Filters: Exploring Photoshop Filters:
Leverage Photoshop’s built-in filters to experiment with various vintage effects. The ‘Camera Raw Filter’ and ‘Gradient Map’ are powerful tools that offer a range of presets and customization options. Adjust parameters like contrast, saturation, and color balance to achieve the desired vintage look.
10. Final Touches and Fine-Tuning: Crafting Authenticity:
Zoom in and scrutinize your image for any inconsistencies. Fine-tune the adjustments, refine the color balance, and ensure that each element contributes to the overall vintage aesthetic. Pay attention to details, such as scratches or speckles, to add a layer of authenticity to your retro photo effect.
Conclusion:
Mastering the art of the retro photo effect in Photoshop involves a delicate balance between technical adjustments and creative intuition. As you navigate the various tools and techniques outlined in this guide, remember that the essence of vintage photography lies not only in replicating visual characteristics but also in evoking emotions and memories associated with a bygone era.
Whether you’re reviving old family photographs, creating vintage-inspired digital art, or simply exploring the rich tapestry of retro aesthetics, the skills acquired in crafting the retro photo effect will serve as a valuable addition to your creative toolkit. Embrace the timeless appeal of the past, infuse your digital images with nostalgia, and let the art of retro photography transport both you and your viewers to a different, yet familiar, time and place.