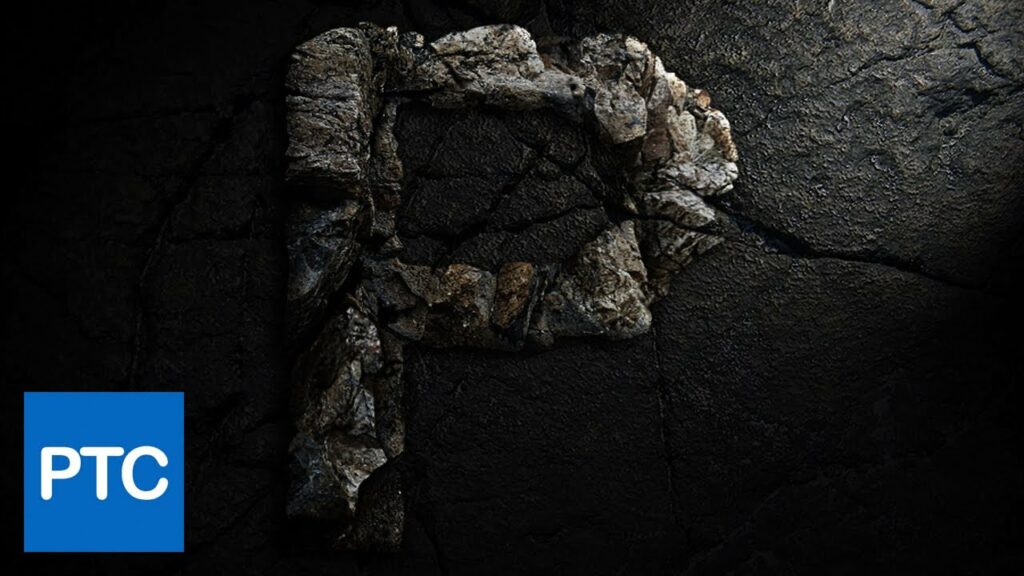
From Stone to Spectacle: A Comprehensive Guide on Creating a Realistic Rock Text Effect in Photoshop
Introduction:
Photoshop stands as a versatile playground for creative minds, offering an array of tools to transform ordinary text into extraordinary visual spectacles. Among the myriad possibilities, creating a realistic rock text effect adds a touch of nature’s rugged beauty to digital designs. In this extensive guide, we will unravel the step-by-step process of crafting a realistic rock text effect in Photoshop, enabling you to merge the raw aesthetics of stone with the finesse of digital design. Whether you’re a graphic designer, a digital artist, or an enthusiast exploring the realms of Photoshop, this tutorial will equip you to breathe life into your text with the authenticity of weathered rock.
1. Setting the Foundation: Choosing the Right Font and Background:
Begin by selecting a font that complements the rugged nature of rock. Fonts with bold, uneven strokes work well. Consider the visual impact you want to achieve, whether it’s a monumental stone carving or a weathered rock surface. Create a new document with a background that contrasts or harmonizes with the rock texture, enhancing the overall effect.
2. Creating the Text Layer: Spell It in Stone:
Type your desired text using the chosen font. Experiment with the size, spacing, and alignment to achieve the desired composition. Keep in mind that the text will serve as the canvas for your rock texture, so choose a size that allows for intricate detailing.
3. Acquiring the Rock Texture: Nature’s Blueprint:
To infuse authenticity into your design, source a high-resolution rock texture. Websites offering free textures or your own photographs of rocks can serve as excellent starting points. Import the chosen texture into Photoshop and place it above your text layer.
4. Clipping Mask Magic: Sculpting the Text with Rock Texture:
Harness the power of clipping masks to mold the rock texture to the contours of your text. Right-click on the rock texture layer, select “Create Clipping Mask,” and watch as the texture seamlessly conforms to the shape of your text. Experiment with the position and size of the texture to find the most captivating arrangement.
5. Blend Modes and Opacity: The Alchemy of Texture Integration:
Explore blend modes to harmonize the rock texture with your text. Overlay, Multiply, or Soft Light are often effective choices. Adjust the opacity to fine-tune the balance between the text and the rock texture, ensuring a realistic and cohesive integration.
6. Sculpting Realism: Dodge and Burn Techniques:
To enhance the three-dimensional appearance of your rock text, employ Dodge and Burn techniques. Using the Dodge Tool, highlight areas that would catch light, simulating the natural contours of rock. Conversely, use the Burn Tool to create shadows, adding depth and realism to your text.
7. Color Adjustments: Tints and Hues:
Experiment with color adjustments to impart a natural palette to your rock text. Use Hue/Saturation and Color Balance adjustments to introduce subtle tints or shifts in color. Mimic the earthy tones of rocks or add a touch of mossy green for an organic touch.
8. Adding Surface Details: A Touch of Weathering:
For a more authentic look, incorporate surface details that mimic the effects of weathering. Use brushes or texture overlays to introduce cracks, scratches, or mossy patches. These subtle details contribute to the realism of your rock text effect.
9. Depth Enhancement: Layer Styles and Inner Shadows:
Elevate your rock text by applying layer styles. Inner Shadows can simulate crevices and recesses in the rock, enhancing the perception of depth. Experiment with the size, distance, and opacity of the Inner Shadow to achieve a convincing rock surface.
10. Final Touches and Refinement: The Art of Polish:
Zoom in and scrutinize your rock text for any imperfections. Refine the details, adjust the lighting effects, and ensure a seamless integration of the rock texture with the text. Consider additional enhancements, such as glows or gradients, to add a touch of magic to your realistic rock text effect.
Conclusion:
Creating a realistic rock text effect in Photoshop is a journey that combines artistic intuition with technical prowess. As you navigate the intricacies of blending modes, layer styles, and texture integration, remember that the magic lies in the details.
Whether you’re designing a logo, a poster, or a digital illustration, the realistic rock text effect offers a unique visual language that speaks of nature’s resilience and timeless beauty. Embrace the fusion of digital design and earthly textures, and let your text emerge from the digital canvas with the rugged authenticity of weathered rock. With this guide as your companion, embark on the exploration of creating captivating and realistic rock text effects in Photoshop.