Unleashing the Colors: A Comprehensive Guide on How to Create a Psychedelic Tiger Illustration in Photoshop
Introduction:
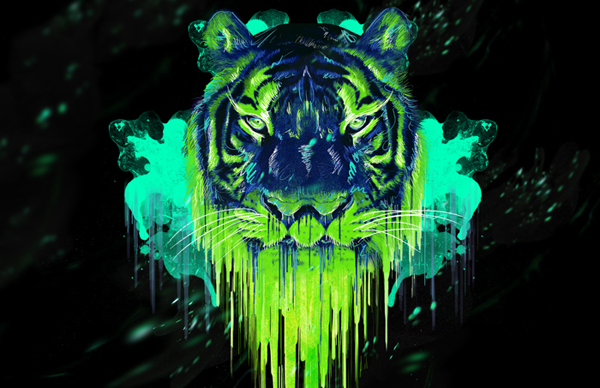
Embark on a mesmerizing journey into the realm of psychedelic art as we delve into the process of creating a vibrant and visually stunning psychedelic tiger illustration in Adobe Photoshop. This comprehensive guide will walk you through each step, from setting up your canvas to applying intricate patterns and vibrant colors that evoke the essence of psychedelic art. Unleash your creativity and let the tiger come to life with kaleidoscopic brilliance on your digital canvas.
Chapter 1: Setting Up Your Canvas
- Open Photoshop and Create a New Document:
- Launch Adobe Photoshop and create a new document. Choose a high-resolution canvas to ensure detailed artwork.
- Select Background Color:
- Choose a vibrant background color that complements the psychedelic theme. Consider bold hues like neon pink, electric blue, or cosmic purple.
- Import Tiger Reference Image:
- Find a high-quality image of a tiger and import it into Photoshop. This image will serve as a reference for creating the psychedelic illustration.
Chapter 2: Outlining the Tiger
- Create a New Layer:
- Start by creating a new layer for the outline. This allows you to work on the illustration without altering the original reference image.
- Use the Pen Tool:
- Select the Pen Tool (P) and begin outlining the tiger. Create smooth curves and define the main features such as the face, body, and stripes.
- Adjust the Stroke:
- Customize the stroke settings to achieve the desired line thickness. Experiment with different stroke options to find the one that suits your artistic vision.
Chapter 3: Adding Psychedelic Patterns
- Create a New Layer for Patterns:
- Make a new layer dedicated to psychedelic patterns. This layer will be placed below the tiger outline layer.
- Select the Brush Tool (B):
- Choose a variety of psychedelic brushes or create your own. Experiment with swirls, spirals, and intricate patterns to fill the tiger’s form.
- Apply Vibrant Colors:
- Use a vibrant color palette inspired by psychedelic art. Electric blues, neon greens, and psychedelic purples can bring the illustration to life.
Chapter 4: Blending and Texturing
- Blend Psychedelic Patterns with the Tiger:
- Adjust the blending modes of the pattern layer to seamlessly integrate it with the tiger outline. Experiment with blending options such as Overlay, Multiply, or Screen.
- Add Texture:
- Incorporate texture overlays to enhance the psychedelic effect. Experiment with grunge textures or patterns that add depth to the illustration.
Chapter 5: Detailing the Tiger
- Refine Tiger Features:
- Go back to the tiger outline layer and refine details. Add intricate patterns within the stripes, enhance facial features, and bring out the tiger’s expression.
- Experiment with Opacity:
- Adjust the opacity of different layers to control the intensity of patterns and colors. This allows you to create a balance between the tiger’s form and the psychedelic elements.
Chapter 6: Play with Lighting and Shadows
- Create a New Layer for Lighting:
- Generate a new layer for lighting effects. Use soft brushes with vibrant colors to simulate psychedelic lighting on the tiger.
- Add Glow and Highlights:
- Introduce glow effects around the edges of the tiger and apply highlights to emphasize specific areas. This enhances the illusion of a psychedelic, otherworldly atmosphere.
Chapter 7: Fine-Tune Colors and Contrast
- Adjustment Layers:
- Utilize adjustment layers such as Hue/Saturation, Color Balance, and Curves to fine-tune colors. Enhance the overall contrast and vibrancy to achieve the desired psychedelic look.
Chapter 8: Final Touches and Details
- Fine Details and Accents:
- Zoom in and add fine details and accents to refine the illustration. This may include intricate patterns within the tiger’s fur or additional psychedelic elements.
- Check Composition:
- Ensure the composition flows harmoniously. Adjust elements as needed to create a visually captivating and balanced illustration.
Chapter 9: Save and Export
- Save Your Work:
- Save your Photoshop file to preserve all layers for future edits.
- Export as Image:
- When satisfied with the final result, export the illustration as a high-resolution image in your preferred format (JPEG, PNG, etc.).
Chapter 10: Showcasing Your Psychedelic Tiger
- Share Your Artwork:
- Share your psychedelic tiger illustration on social media platforms, art communities, or your portfolio. Connect with fellow artists and gather feedback to fuel your creative journey.
- Experiment and Explore:
- Use the techniques learned in this guide to create variations of psychedelic art. Explore different subjects, patterns, and color schemes to expand your artistic repertoire.
Conclusion:
Creating a psychedelic tiger illustration in Photoshop is a captivating venture into the realm of vibrant colors, intricate patterns, and artistic expression. This comprehensive guide has equipped you with the tools and techniques to bring your psychedelic vision to life. Unleash your creativity, experiment with colors and patterns, and let your imagination soar as you embark on a journey of digital artistry. The psychedelic tiger awaits, a testament to the fusion of nature and the surreal in the vast canvas of your imagination.


