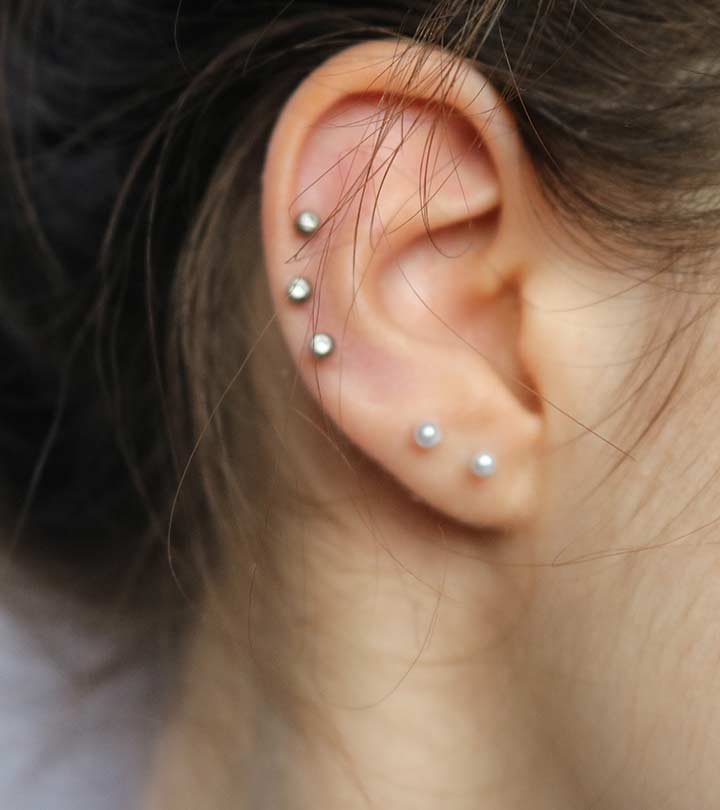
A Comprehensive Guide to Ear Piercing: How to Safely and Stylishly Pierce Your Ear

Introduction:
Ear piercing is a timeless form of self-expression, with a rich history spanning various cultures and traditions. Whether you’re considering a single lobe piercing or a more intricate cartilage piercing, understanding the process, aftercare, and styling options is crucial. This comprehensive guide will take you through the step-by-step process of safely piercing your ear at home, covering essential aspects such as preparation, equipment, techniques, aftercare, and styling tips.
Section 1: Preparing for Ear Piercing
1.1 Gather Necessary Supplies:
1.1.1 Sterilized Piercing Needle:
- Acquire a sterile, single-use piercing needle designed specifically for ear piercings.
1.1.2 Surgical Marker:
- Use a surgical marker to mark the desired piercing location on your ear.
1.1.3 Disinfectant Solution:
- Choose a gentle disinfectant solution, such as saline solution, for cleaning the ear before and after piercing.
1.1.4 Sterile Gloves:
- Wear sterile gloves to maintain a clean environment during the piercing process.
1.2 Choose the Right Earring:
1.2.1 Surgical Stainless Steel or Titanium:
- Select earrings made from surgical stainless steel or titanium for their hypoallergenic properties and reduced risk of infection.
1.2.2 Stud Earrings:
- Opt for stud earrings with a secure backing for initial piercings to promote healing.
Section 2: Marking the Piercing Location
2.1 Sterilize the Ear:
2.1.1 Cleanse with Disinfectant:
- Use a sterile cotton ball or pad soaked in disinfectant solution to cleanse the ear thoroughly.
2.1.2 Allow to Air Dry:
- Allow the ear to air dry completely before marking the piercing location.
2.2 Marking Guidelines:
2.2.1 Locate Key Points:
- Identify key points for marking, such as the center of the lobe or specific locations for cartilage piercings.
2.2.2 Consider Symmetry:
- Ensure symmetry by measuring and marking both ears if planning multiple piercings.
2.2.3 Use a Surgical Marker:
- Gently mark the chosen location with a surgical marker, ensuring accuracy and precision.
Section 3: Sterilizing the Needle and Earring
3.1 Needle Sterilization:
3.1.1 Use Pre-Sterilized Needles:
- Ideally, purchase pre-sterilized, single-use needles designed for ear piercing.
3.1.2 If Sterilizing at Home:
- Boil the needle in water for at least 15 minutes or use a specialized needle sterilization solution.
3.2 Earring Sterilization:
3.2.1 Soak in Disinfectant:
- Submerge the chosen earring in the disinfectant solution and let it soak for a few minutes.
3.2.2 Wipe with Sterile Cloth:
- Wipe the earring with a sterile cloth or cotton ball to ensure cleanliness.
Section 4: Performing the Ear Piercing
4.1 Put on Sterile Gloves:
4.1.1 Maintain Cleanliness:
- Wear sterile gloves to prevent contamination during the piercing process.
4.2 Needle Technique:
4.2.1 Steady Hand:
- Maintain a steady hand to ensure a clean and precise piercing.
4.2.2 Swift Motion:
- Pierce the ear with a swift, controlled motion to minimize discomfort and promote quicker healing.
4.3 Inserting the Earring:
4.3.1 Immediate Insertion:
- Immediately insert the sterilized earring into the pierced hole to prevent it from closing.
4.3.2 Secure Backing:
- Secure the backing of the earring to keep it in place.
Section 5: Aftercare for Newly Pierced Ears
5.1 Clean the Piercing:
5.1.1 Saline Solution Rinse:
- Rinse the pierced area with a saline solution twice a day to keep it clean.
5.1.2 Avoid Harsh Cleaning Agents:
- Avoid using harsh cleaning agents, alcohol, or hydrogen peroxide, as they can delay the healing process.
5.2 Minimize Movement:
5.2.1 Avoid Touching:
- Refrain from touching the newly pierced ear with dirty hands to prevent infections.
5.2.2 Minimize Rotational Movement:
- Minimize rotational movement of the earring to promote optimal healing.
5.3 Be Mindful of Clothing and Hair:
5.3.1 Choose Loose-Fitting Clothing:
- Opt for loose-fitting clothing around the ear to avoid unnecessary friction.
5.3.2 Tie Back Long Hair:
- Tie back long hair to prevent it from snagging on the earring.
Section 6: Troubleshooting and Healing Signs
6.1 Normal Healing Signs:
6.1.1 Mild Swelling:
- Expect mild swelling, redness, and tenderness immediately after piercing.
6.1.2 Clear Discharge:
- A clear or slightly white discharge is normal during the initial healing stages.
6.2 Signs of Infection:
6.2.1 Persistent Redness:
- Consult a professional if redness, swelling, or tenderness persists beyond the initial healing phase.
6.2.2 Pus or Yellow Discharge:
- Yellow or green discharge may indicate infection and requires prompt attention.
Section 7: Changing Earrings and Styling Options
7.1 Changing Earrings:
7.1.1 Wait for Full Healing:
- Wait until the ear is fully healed before changing earrings to prevent complications.
7.1.2 Gradual Introduction:
- Gradually introduce different earring styles, ensuring they are clean and hypoallergenic.
7.2 Styling Tips:
7.2.1 Showcase with Updos:
- Display your new piercing with stylish updos or side-swept hairstyles.
7.2.2 Mix and Match Earrings:
- Experiment with mixing and matching earrings for a trendy and eclectic look.
Section 8: Seeking Professional Help
8.1 Complications or Concerns:
8.1.1 Persistent Issues:
- Consult a professional piercer or healthcare provider if you experience persistent issues or concerns.
8.1.2 Professional Removal:
- Seek professional help for earring removal if it becomes embedded or if there are signs of complications.
Conclusion:
Ear piercing is a personal and empowering form of self-expression, but it comes with responsibilities for proper care and hygiene. By following this comprehensive guide on how to pierce your ear safely and stylishly, you can embark on a journey of self-adornment with confidence. Remember, patience and diligence during the healing process are key to ensuring a successful and aesthetically pleasing outcome. Whether you’re opting for a classic lobe piercing or a more adventurous cartilage piercing, the art of ear piercing is a timeless tradition that allows you to express your individuality with a touch of elegance and style.


