Unveiling the Perfect Vimeo Render: A Comprehensive Guide to Rendering Projects for Vimeo in DaVinci Resolve
Introduction:
Rendering projects for Vimeo is a pivotal aspect of the video production process, allowing creators to showcase their work on one of the most prominent video-sharing platforms for filmmakers, artists, and content creators. DaVinci Resolve, a leading editing software renowned for its robust feature set, offers editors a plethora of tools and workflows for rendering projects optimized for Vimeo. However, mastering the intricacies of Vimeo’s video requirements and configuring render settings accordingly can be a daunting task. In this comprehensive guide, we’ll delve into the nuances of rendering projects for Vimeo in DaVinci Resolve, empowering creators to deliver high-quality content that captivates and inspires audiences on the platform.
Understanding Vimeo Video Requirements:
Before delving into the specifics of rendering projects for Vimeo in DaVinci Resolve, it’s essential to understand Vimeo’s video requirements and specifications.
- Resolution and Aspect Ratio:
- Vimeo supports various resolutions and aspect ratios for video uploads, including standard definition (SD), high definition (HD), and ultra-high definition (UHD or 4K). Common aspect ratios include 16:9 (widescreen) and 4:3 (standard). Choose the resolution and aspect ratio that best suits your content and audience preferences.
- Frame Rate:
- Vimeo accepts a range of frame rates for video uploads, including 24fps, 25fps, 30fps, and 60fps. Choose the frame rate that aligns with your project’s aesthetic and intended viewing experience. Higher frame rates are ideal for fast-paced action sequences or gaming content, while lower frame rates may be suitable for cinematic or narrative storytelling.
- Codec and Compression:
- Vimeo recommends using advanced video codecs such as H.264 (AVC) or H.265 (HEVC) for optimal video quality and compression efficiency. These codecs offer high-quality compression while minimizing file size, making them ideal for online streaming. Adjust compression settings such as bitrate, profile, and level to balance quality with file size.
Now, let’s explore how to render projects for Vimeo in DaVinci Resolve, step by step.
Rendering Projects for Vimeo in DaVinci Resolve:
DaVinci Resolve provides a seamless workflow for rendering projects for Vimeo, enabling creators to customize export settings and configurations to meet Vimeo’s requirements and specifications. Let’s delve into the step-by-step process of rendering projects for Vimeo in DaVinci Resolve:
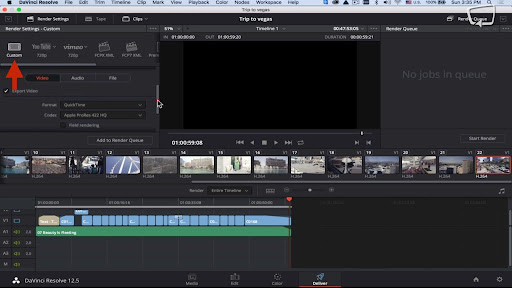
- Accessing the Deliver Page:
- Navigate to the Deliver page within DaVinci Resolve to access the export settings and options. The Deliver page provides a dedicated interface for configuring export settings, choosing output formats, and initiating the rendering process.
- Selecting the Timeline:
- Choose the timeline or sequence you wish to render for Vimeo from the timeline dropdown menu within the Deliver page. Ensure that the selected timeline contains the content you want to upload to Vimeo, including video clips, audio tracks, and any other elements.
- Setting the Export Range:
- Determine the portion of the timeline you wish to render for Vimeo by setting the export range within DaVinci Resolve. You can choose to render the entire timeline or specify a custom range by setting in and out points on the timeline.
- Customizing Export Settings:
- Customize export settings according to Vimeo’s requirements and specifications. DaVinci Resolve offers a wide range of export settings and options, including resolution, frame rate, codec, and compression. Adjust these settings based on Vimeo’s recommended settings and your project’s needs.
- Choosing Output Format:
- Select the output format for your rendered project based on Vimeo’s compatibility requirements. Vimeo accepts a variety of video formats, including MP4, MOV, and AVI. Choose the appropriate format that best suits your content and upload preferences.
- Adjusting Codec and Compression:
- Choose the codec and compression settings for your rendered project to achieve optimal quality and file size. Vimeo recommends using advanced video codecs such as H.264 (AVC) for efficient streaming. Adjust compression settings such as bitrate, profile, and level to balance quality with file size.
- Configuring Audio Settings:
- Customize audio settings such as sample rate, bit depth, and channel layout to ensure optimal audio quality in the rendered file. Choose audio settings that are compatible with Vimeo’s requirements and your project’s needs.
- Adding Metadata and Watermarks:
- Optionally, add metadata or watermarks to your rendered project to provide additional information or branding. DaVinci Resolve allows you to embed metadata such as title, author, copyright information, and more into the rendered file. You can also add watermarks or logos to protect your content or promote your brand.
- Previewing and Reviewing:
- Preview the render settings and configuration before initiating the rendering process to ensure that everything is configured correctly. Use the preview window within the Deliver page to review the export settings, output format, resolution, and other parameters.
- Saving Presets:
- Save custom render presets for Vimeo to streamline your workflow and ensure consistency across projects. DaVinci Resolve allows you to save and reuse render presets, making it easy to apply consistent settings to multiple renders for Vimeo.
- Initiating the Rendering:
- Once you’re satisfied with the render settings and configuration, initiate the rendering process by clicking the “Add to Render Queue” button within the Deliver page. DaVinci Resolve will add the render job to the render queue, where you can monitor the progress and status of the rendering process.
- Reviewing the Rendered File:
- Once the rendering process is complete, review the rendered file to ensure that it meets Vimeo’s requirements and quality standards. Playback the rendered file in a media player or video editing software to verify the audiovisual integrity, quality, and compatibility of the final output.
Best Practices for Rendering Projects for Vimeo:
To achieve optimal results when rendering projects for Vimeo in DaVinci Resolve, consider the following best practices:
- Know Vimeo’s Guidelines:
- Familiarize yourself with Vimeo’s recommended settings and guidelines for video uploads, including resolution, frame rate, codec, and compression. Adhering to these guidelines ensures optimal compatibility and quality for your uploaded videos.
- Optimize for Streaming:
- Optimize your render settings and configurations for efficient streaming on Vimeo by choosing appropriate codecs, compression settings, and audio configurations. Strike a balance between quality and file size to ensure smooth playback and fast loading times for viewers.
- Maintain Visual Quality:
- Preserve the visual quality of your content during the rendering process by choosing high-quality codecs, minimal compression, and appropriate resolution settings. Aim for crisp, clear visuals that enhance the viewing experience for Vimeo audiences.
- Consider Vimeo’s Audience:
- Tailor your content to Vimeo’s audience preferences and viewing habits. Experiment with different aspect ratios, visual styles, and storytelling techniques to engage and captivate Vimeo viewers.
- Promote Engagement:
- Encourage viewer engagement and interaction with your content by adding captions, annotations, and interactive elements. Prompt viewers to like, comment, and share your videos to increase visibility and reach on the platform.
Conclusion:
Rendering projects for Vimeo in DaVinci Resolve is a vital step in the video production process, enabling creators to showcase their work on one of the most prominent video-sharing platforms for filmmakers and artists. By understanding Vimeo’s requirements and recommendations for video uploads, leveraging DaVinci Resolve’s powerful rendering tools and workflows, and following best practices for rendering projects for Vimeo, creators can deliver high-quality content that captivates and inspires audiences on the platform. With careful attention to detail, thoughtful consideration of render settings, and adherence to best practices, creators can optimize their content for maximum impact on Vimeo, fostering meaningful connections and interactions with their audience. By mastering the art of rendering projects for Vimeo in DaVinci Resolve, creators can elevate their presence on the platform and unlock new opportunities for recognition, engagement, and success in the dynamic landscape of online video.