Capturing Every Moment: A Comprehensive Guide to Recording Your Screen in Windows 10

Screen recording has become an essential tool for various purposes, from creating tutorials and presentations to capturing gameplay and sharing experiences with others. Windows 10 offers a built-in screen recording feature that allows users to capture their screen activities with ease. Whether you’re a professional content creator, educator, or casual user, knowing how to record your screen in Windows 10 can be invaluable for expressing ideas, demonstrating processes, and sharing information effectively. In this comprehensive guide, we’ll explore the process of screen recording in Windows 10, discuss the different methods available, and provide practical tips for optimizing your screen recording experience.
Understanding Screen Recording in Windows 10:
Screen recording in Windows 10 allows users to capture their desktop activities, including applications, presentations, videos, and more, in real-time. This feature is particularly useful for creating instructional videos, demonstrating software workflows, or capturing gameplay footage. With the ability to record audio alongside the screen capture, users can provide commentary, narration, or sound effects to enhance their recordings. Whether you’re a professional or a novice user, Windows 10 provides intuitive tools for screen recording that are accessible to everyone.
Key Features and Benefits:
Recording your screen in Windows 10 offers several key features and benefits:
- Versatility: Screen recording in Windows 10 can be used for a wide range of purposes, including creating tutorials, presentations, demonstrations, gameplay videos, and more.
- Ease of Use: Windows 10 offers built-in screen recording capabilities that are easy to access and use, requiring minimal setup or configuration.
- Customizable Settings: Users can customize various recording settings, such as video quality, audio input, and recording area, to suit their specific needs and preferences.
- Real-Time Capture: Screen recording in Windows 10 captures desktop activities in real-time, allowing users to capture dynamic content, interactions, and animations accurately.
- Integrated Tools: Windows 10 includes integrated tools for editing and sharing screen recordings, making it easy to refine and distribute captured content.
How to Record Your Screen in Windows 10:
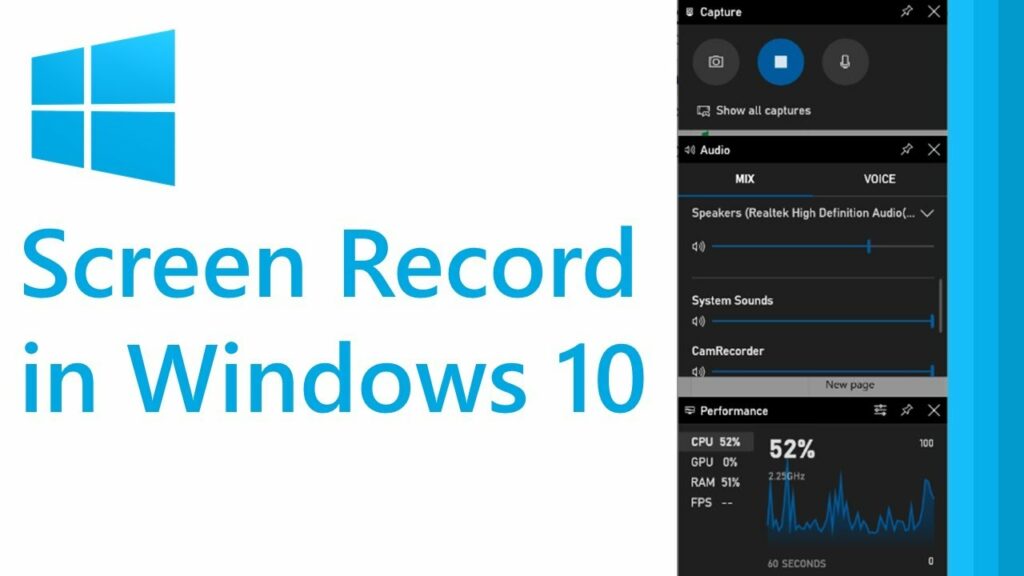
There are several methods for recording your screen in Windows 10, including using built-in features, third-party software, or dedicated hardware. Here’s a step-by-step guide to recording your screen using built-in features:
- Using the Game Bar:
- Press the Windows key + G to open the Game Bar overlay.
- If prompted, confirm that the current application is a game to enable the Game Bar.
- Click on the “Record” button (circle icon) to start recording your screen.
- Alternatively, press Windows key + Alt + R to start and stop recording.
- To access additional settings, such as recording audio, adjusting video quality, or capturing screenshots, click on the settings icon (gear) on the Game Bar overlay.
- Using the Screen Recorder:
- Press Windows key + Alt + R to start and stop recording using the built-in screen recorder.
- This method allows you to capture your entire screen or a specific region without the need for the Game Bar overlay.
- Using the Xbox Game Bar:
- Open the Xbox Game Bar by pressing Windows key + G.
- Click on the “Capture” button (camera icon) to start recording your screen.
- To stop recording, click on the stop button (square icon) on the Game Bar overlay.
- Using the Camera App:
- Open the Camera app from the Start menu or search for “Camera” in the Windows search bar.
- Click on the “Video” button to switch to video mode.
- Click on the record button (circle icon) to start recording your screen.
- To stop recording, click on the stop button (square icon) on the Camera app interface.
Practical Tips for Screen Recording:
Here are some practical tips for optimizing your screen recording experience in Windows 10:
- Plan Your Recording: Before starting your screen recording, plan out what you want to capture and how you want to present it to ensure a smooth and organized recording session.
- Optimize Recording Settings: Adjust recording settings such as video quality, audio input, and recording area based on your preferences and the requirements of your recording project.
- Minimize Distractions: Close unnecessary applications, notifications, and background processes to minimize distractions and ensure a clean and focused recording environment.
- Use Shortcuts: Familiarize yourself with keyboard shortcuts for starting, stopping, and pausing screen recordings to streamline your workflow and save time during recording sessions.
- Practice and Experiment: Experiment with different recording techniques, settings, and tools to find what works best for your specific needs and recording projects.
Conclusion:
Recording your screen in Windows 10 is a versatile and accessible tool for creating tutorials, presentations, demonstrations, and more. With built-in features such as the Game Bar, Screen Recorder, Xbox Game Bar, and Camera app, Windows 10 offers intuitive tools for capturing desktop activities with ease. Whether you’re a professional content creator, educator, or casual user, knowing how to record your screen in Windows 10 empowers you to express ideas, share information, and communicate effectively with others. By following the steps outlined in this guide and applying practical tips for optimizing your screen recording experience, you can unlock the full potential of screen recording in Windows 10 and create compelling content that engages and informs your audience.


