How to Configure BIOS Settings
Configuring BIOS (Basic Input/Output System) settings is essential for optimizing your computer’s performance, ensuring hardware compatibility, and troubleshooting issues. BIOS settings control the basic functions of your computer’s hardware components before the operating system (OS) loads. While the interface and options can vary between different BIOS versions (such as AMI, Phoenix, and Award), the general principles and steps for configuring BIOS settings remain consistent. Here’s an extensive guide to help you navigate and configure BIOS settings effectively.
Understanding BIOS Basics
- Accessing BIOS: Typically, you access BIOS by pressing a specific key during the initial startup process, before the operating system begins to load. Common keys to access BIOS include Del, F2, F10, Esc, or F12, depending on your computer manufacturer.
- BIOS Setup Utility: Once you access BIOS, you’ll enter the BIOS Setup Utility. This interface allows you to view and modify various settings related to hardware configuration, boot options, security settings, and more.
- Navigating BIOS Menus: BIOS menus are usually navigated using the arrow keys, Enter key, and sometimes specific function keys (e.g., F5/F6 for changing values). Some BIOS versions also support mouse navigation.
Essential BIOS Settings to Configure
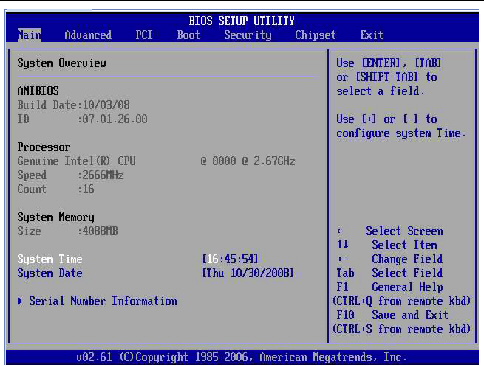
1. Basic System Information
- System Date and Time: Set the current date and time to ensure accurate timekeeping for system logs and scheduled tasks.
- System Information: Check and verify essential system information such as the BIOS version, CPU model, installed memory (RAM), and storage devices.
2. Boot Options
- Boot Device Priority: Specify the order in which devices (such as hard drives, SSDs, optical drives, and USB drives) are checked for bootable operating systems. Ensure your primary boot device (usually your main hard drive or SSD) is listed first.
- Boot Mode: Choose between Legacy BIOS and UEFI boot modes. UEFI (Unified Extensible Firmware Interface) is the modern standard and supports faster boot times and larger disk capacities.
3. Hardware Configuration
- CPU Settings: Some BIOS versions allow you to adjust CPU settings such as clock speed (overclocking), voltage, and virtualization options (e.g., Intel VT-x or AMD-V).
- RAM Settings: Configure RAM timings, frequencies, and enable XMP (Extreme Memory Profile) for higher performance RAM modules.
- Storage Configuration: View and configure settings for storage devices, including AHCI (Advanced Host Controller Interface) or RAID mode settings.
- Peripheral Configuration: Adjust settings for connected peripherals such as USB devices, onboard audio, Ethernet adapters, and SATA controllers.
4. Power Management
- Power-On Options: Configure how the computer behaves after a power loss or when the power button is pressed, such as automatically powering on or remaining off.
- Power Saving Features: Enable or disable power-saving features like CPU power management, standby modes, and wake-up events (e.g., wake on LAN or wake on USB).
5. Security Settings
- BIOS Password: Set a BIOS password to restrict access and prevent unauthorized changes to BIOS settings and boot options.
- Secure Boot: Enable Secure Boot to prevent unauthorized operating systems and malware from loading during the boot process. This feature requires UEFI boot mode and digitally signed bootloaders.
6. Advanced Settings
- Integrated Peripherals: Configure settings for integrated components such as audio, network interfaces, and additional controller cards.
- CPU Features: Adjust advanced CPU settings like hyper-threading, virtualization support, and CPU cache settings.
- Fan Control: Some BIOS versions allow you to control fan speeds and adjust fan curves to optimize cooling performance and noise levels.
7. Exit and Save
- Save Changes and Exit: After making adjustments to BIOS settings, save your changes and exit BIOS Setup Utility. This action typically involves selecting “Save & Exit” or a similar option from the menu.
- Discard Changes: If you decide not to save your changes, you can discard them and exit BIOS without modifying any settings.
Tips for Configuring BIOS Settings
- Read the Manual: Consult your computer or motherboard’s manual for specific instructions and details regarding BIOS settings and options.
- Backup BIOS Settings: Some motherboards allow you to save BIOS settings profiles. Consider saving a profile before making significant changes for easy restoration if needed.
- Update BIOS: Periodically check for BIOS updates from your computer manufacturer’s website. BIOS updates can improve system stability, add new features, and enhance compatibility with hardware components.
- Be Cautious with Overclocking: If you plan to overclock your CPU or RAM, do so gradually and monitor system stability and temperatures to avoid hardware damage.
- Seek Professional Help: If you’re unsure about specific BIOS settings or their implications, consult a professional technician or seek assistance from customer support.
Common Issues and Troubleshooting
- Boot Failure: If your computer fails to boot after changing BIOS settings, re-enter BIOS and revert to default settings (usually found under “Load Setup Defaults” or a similar option).
- Hardware Incompatibility: Adjust settings such as AHCI mode for storage devices or enable/disable onboard components to resolve hardware compatibility issues.
- Password Issues: If you forget your BIOS password, refer to your motherboard’s manual or contact customer support for assistance in resetting or clearing the password.
Conclusion
Configuring BIOS settings is a fundamental aspect of maintaining and optimizing your computer’s performance and functionality. By understanding the purpose of each setting and following best practices for configuration and troubleshooting, you can customize your system to meet your specific needs and ensure smooth operation. Remember to document any changes you make and proceed with caution when adjusting critical settings. With this guide, you’re equipped to navigate and configure BIOS settings confidently for a more efficient and reliable computing experience.


